%2520(1).png%3Falt%3Dmedia%26token%3D6fb48f09-a8eb-423f-8296-83ba614ae5a4)
%2520(1).png%3Falt%3Dmedia%26token%3D6fb48f09-a8eb-423f-8296-83ba614ae5a4)
Hero Section
Add a Hero Section to your Website
You can watch the video version of the article here:
STEP 1:
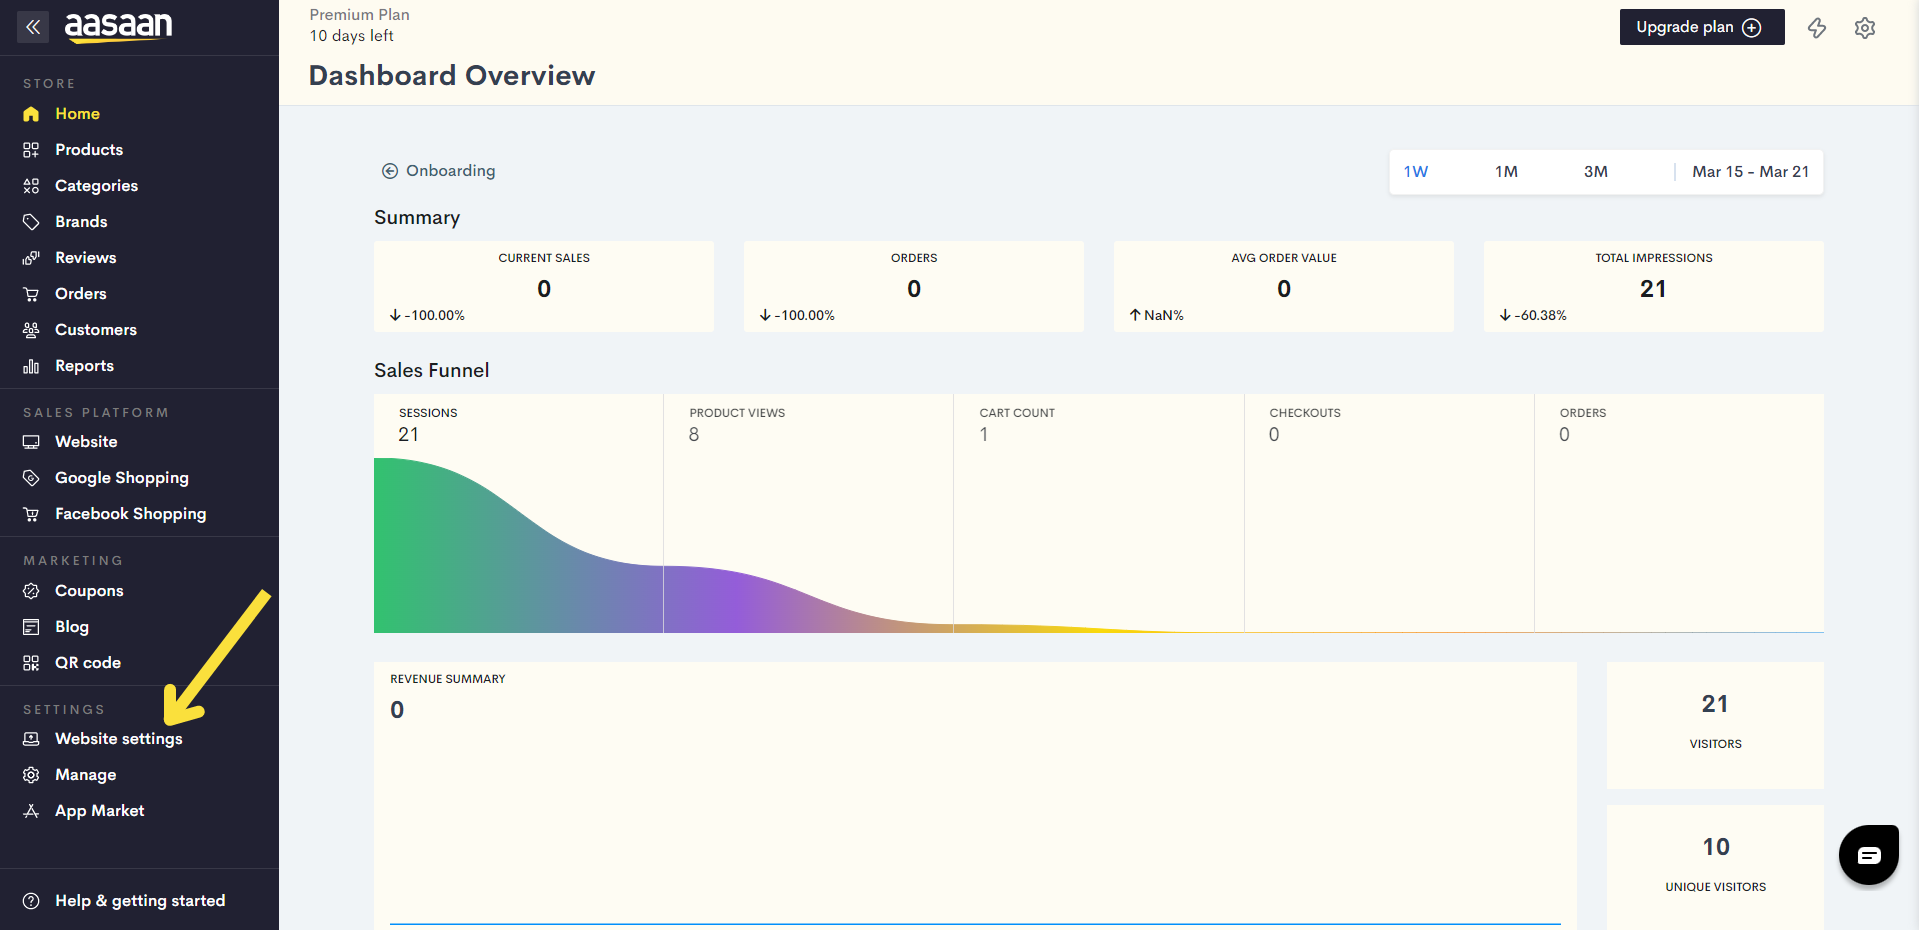
Login to your aasaan admin panel and click on Website Settings.
STEP 2:
Click on an existing content template in which you wish to add your page.
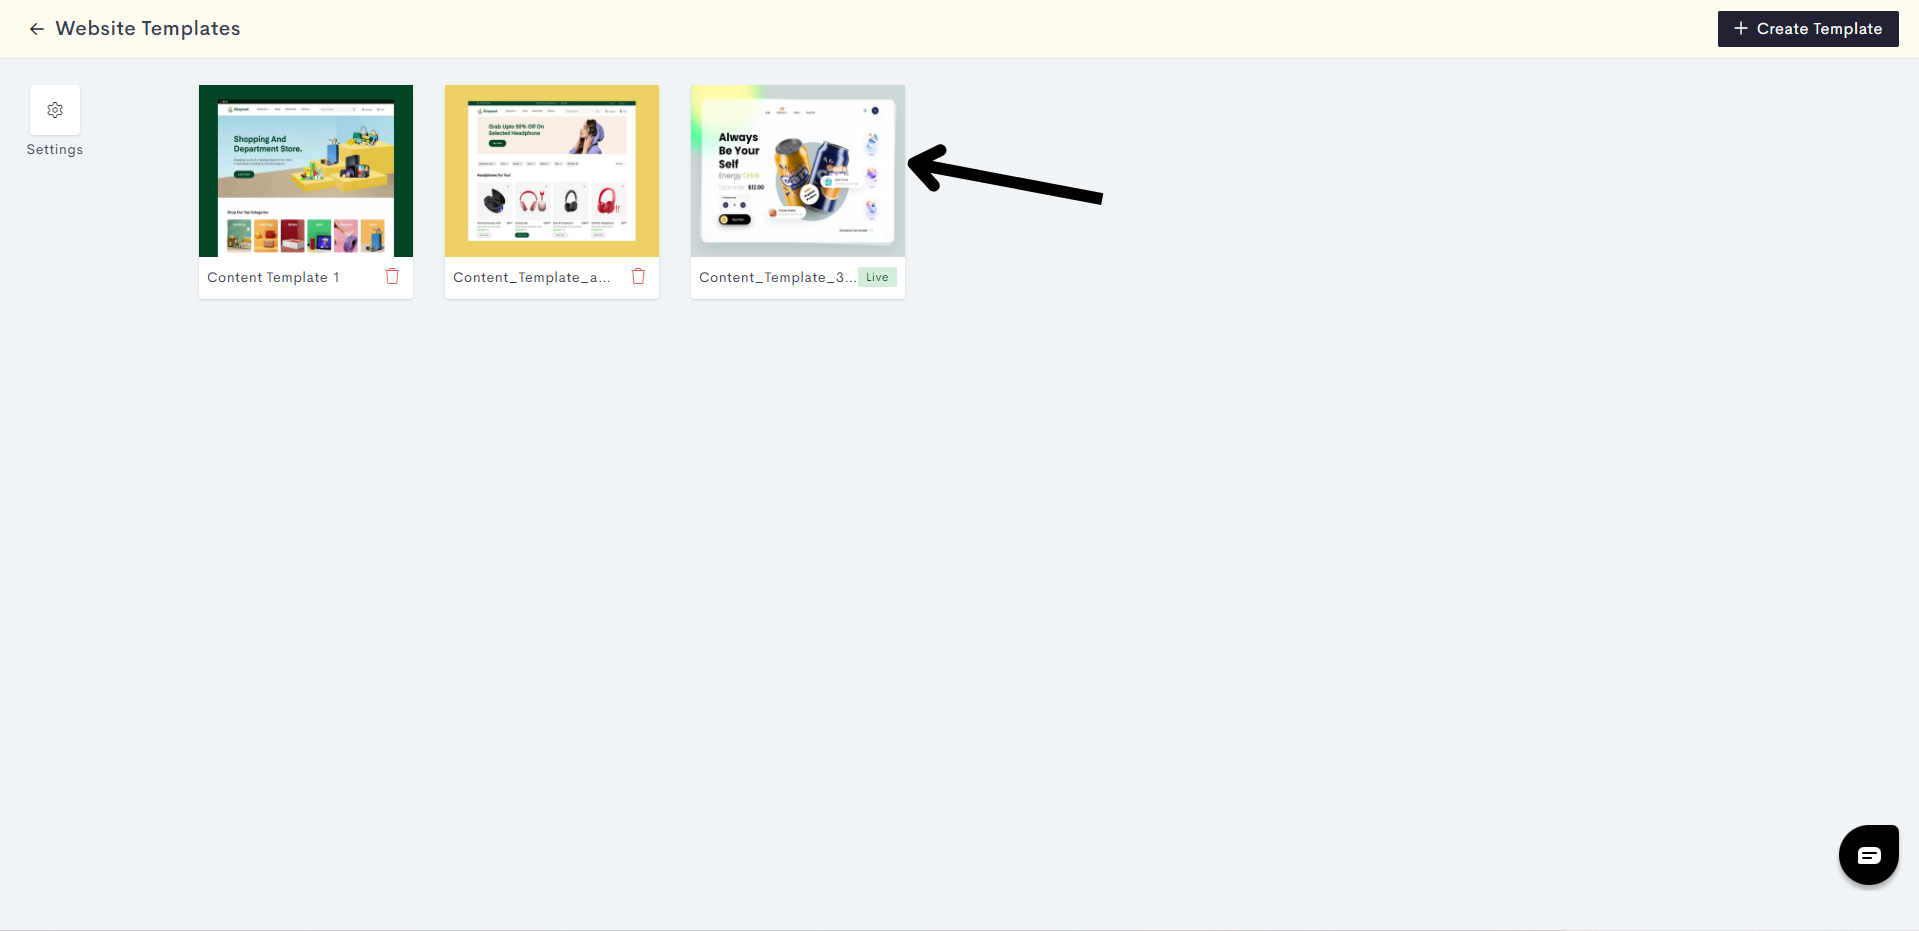
If you wish, you can also create a new content template by clicking on +Create Template.
STEP 3:
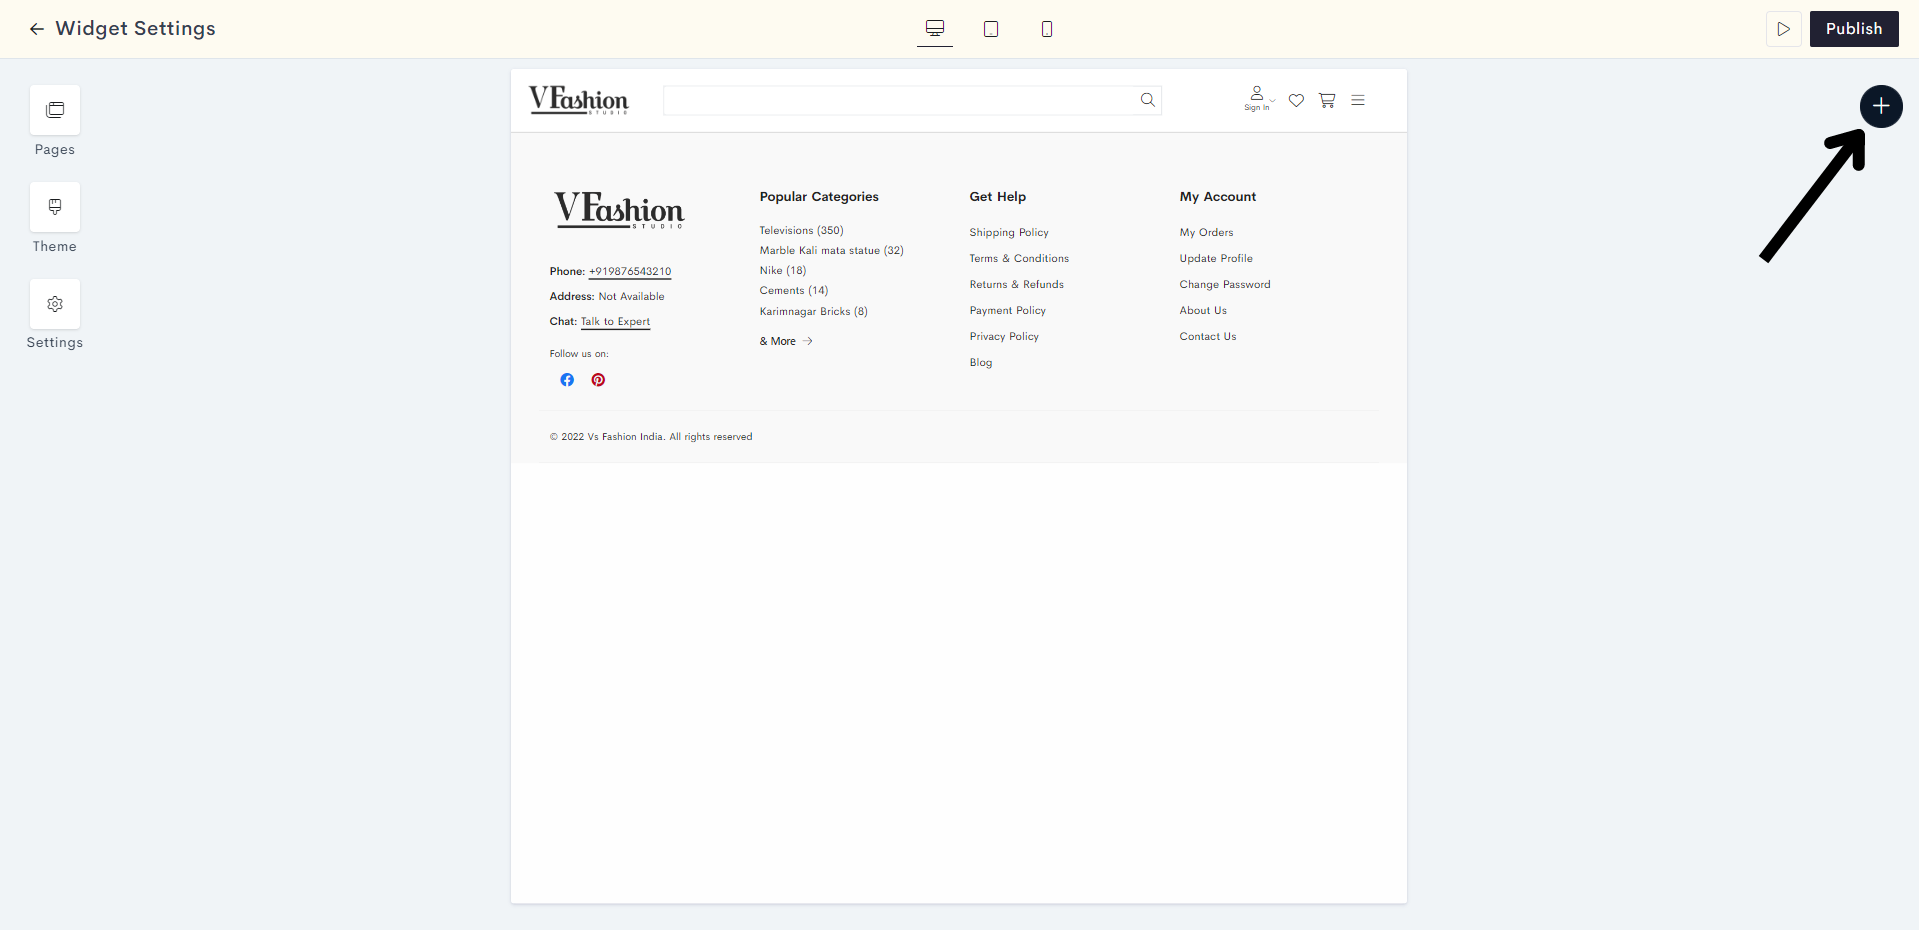
Click on Pages. In the Pages section, you will get to decide which page you would like to add your Hero Section to. In this article, we will add it to our homepage.

STEP 4:
Click on the "Plus" Sign.
STEP 5:
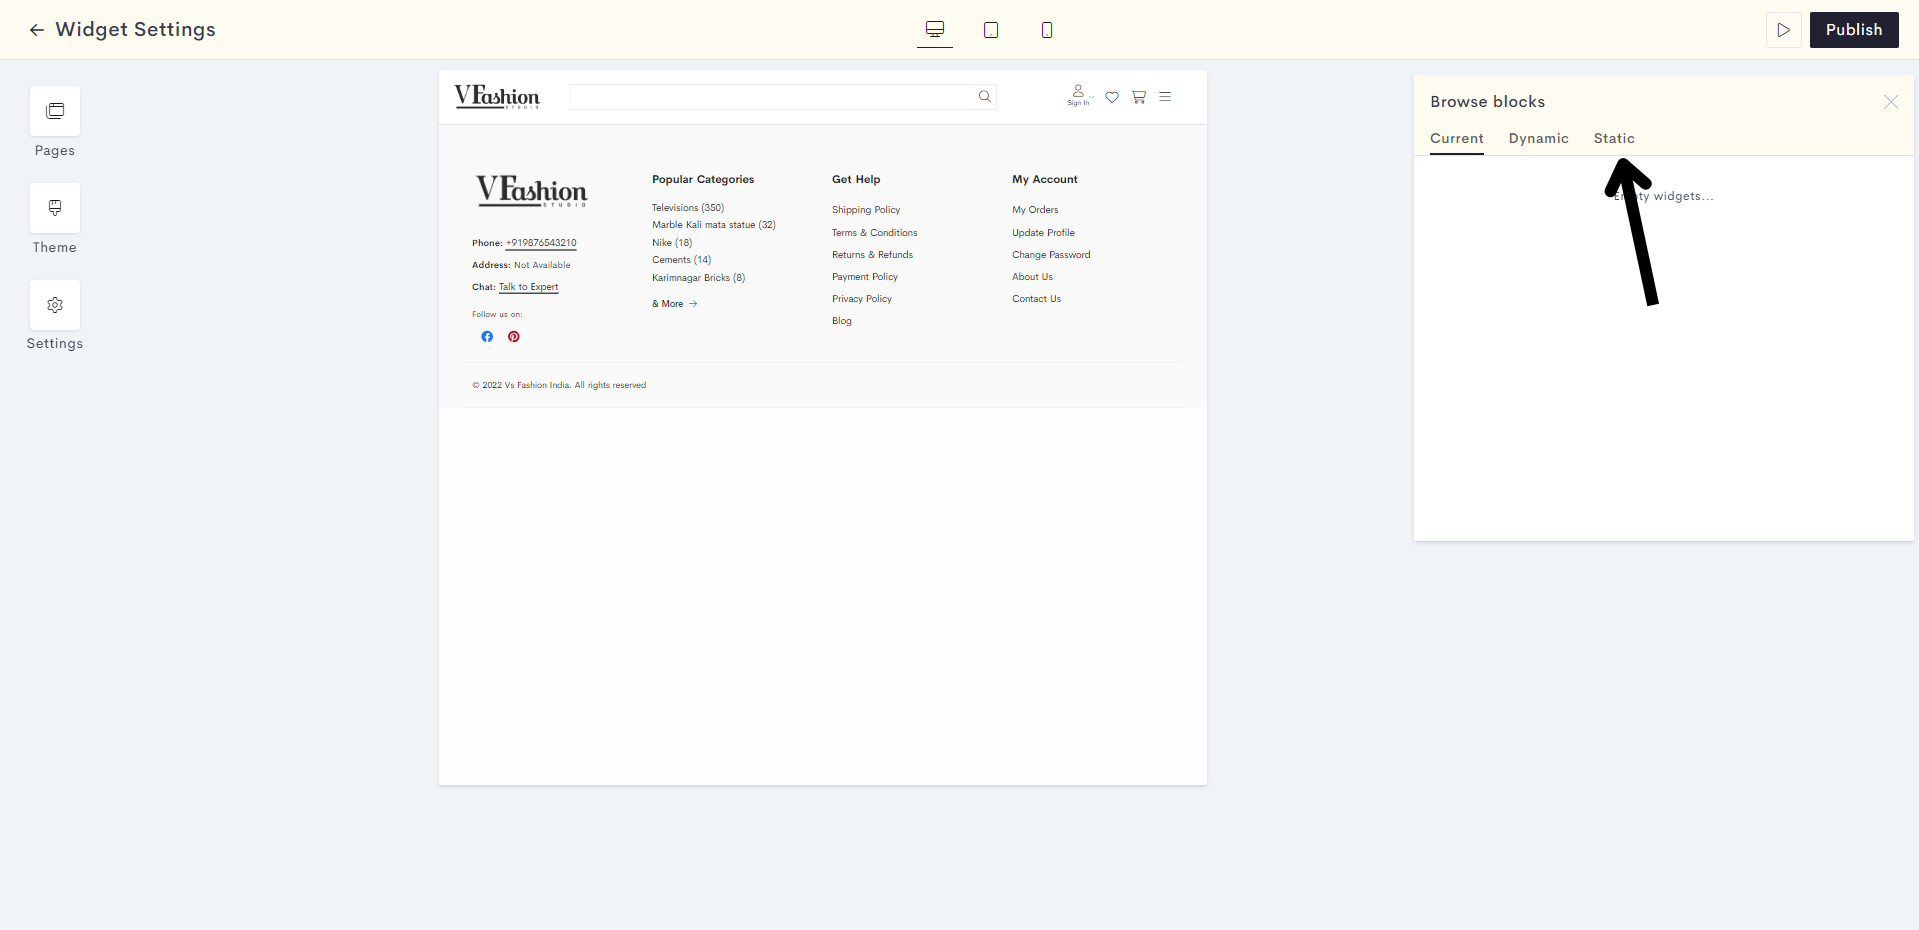
Click on Static.
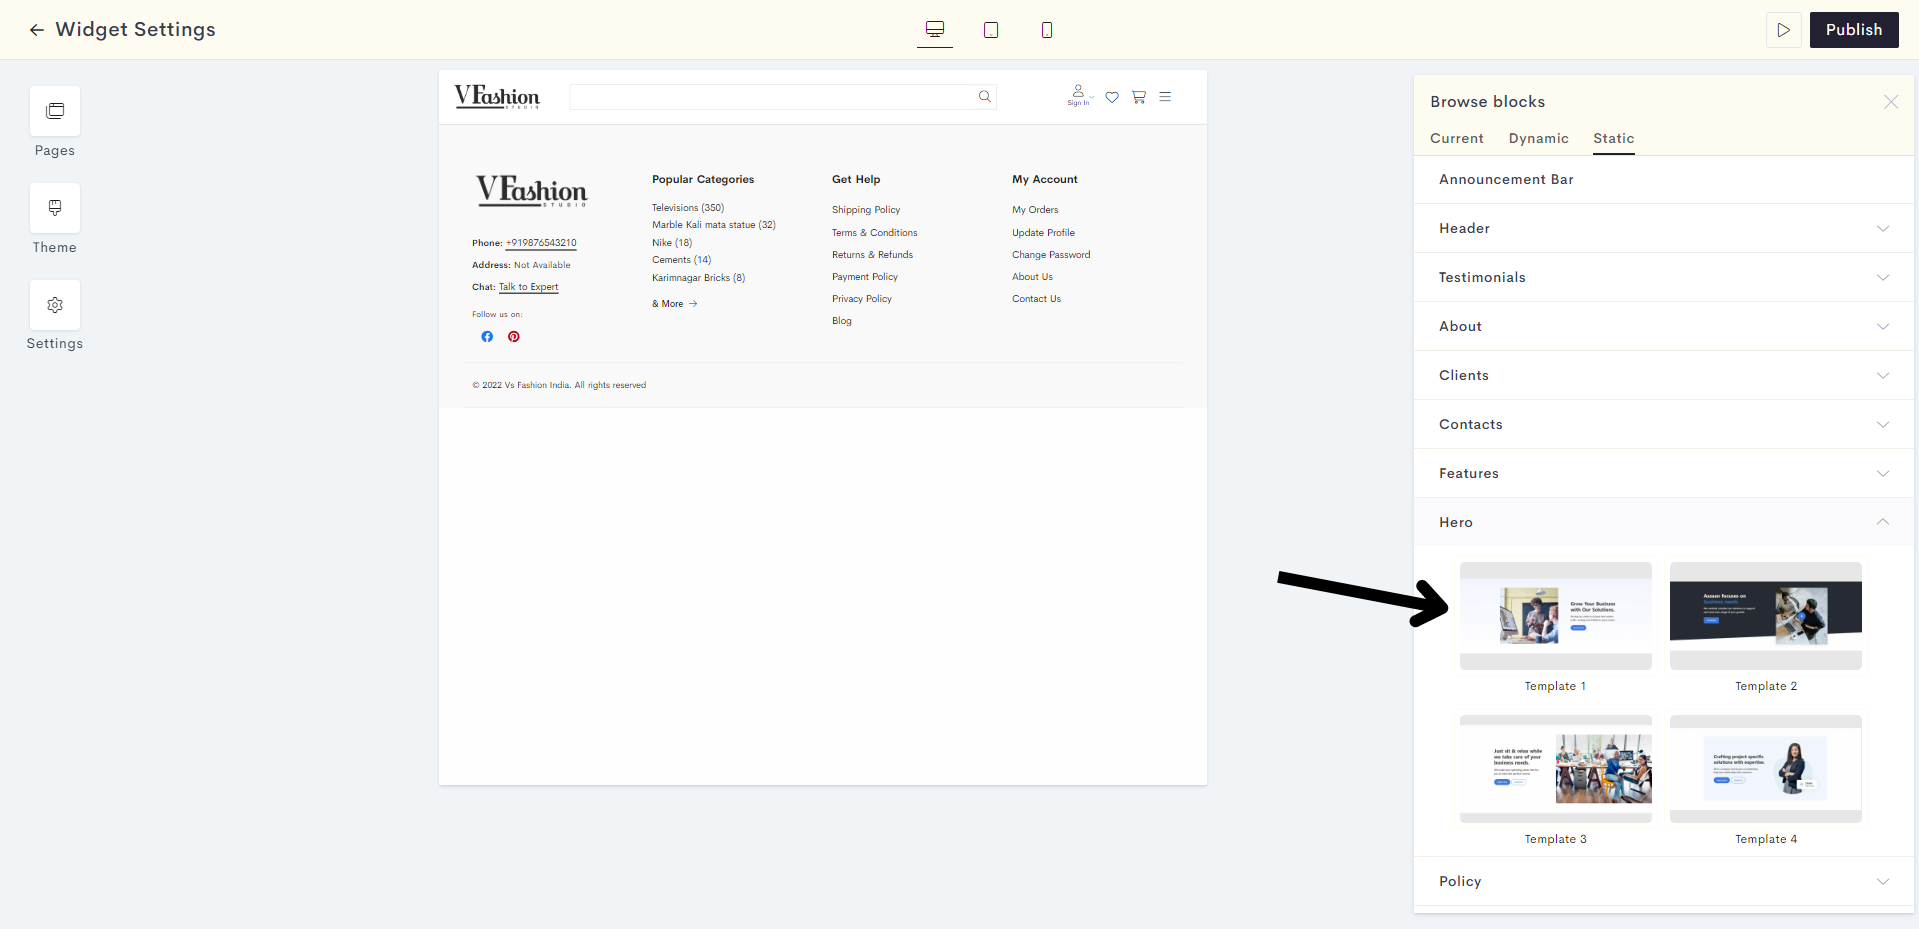
STEP 6:
Expand the Hero dropdown and choose your desired template for the Hero section.
STEP 7:
Click on Add Image to upload your desired image for the Hero section.

STEP 8:
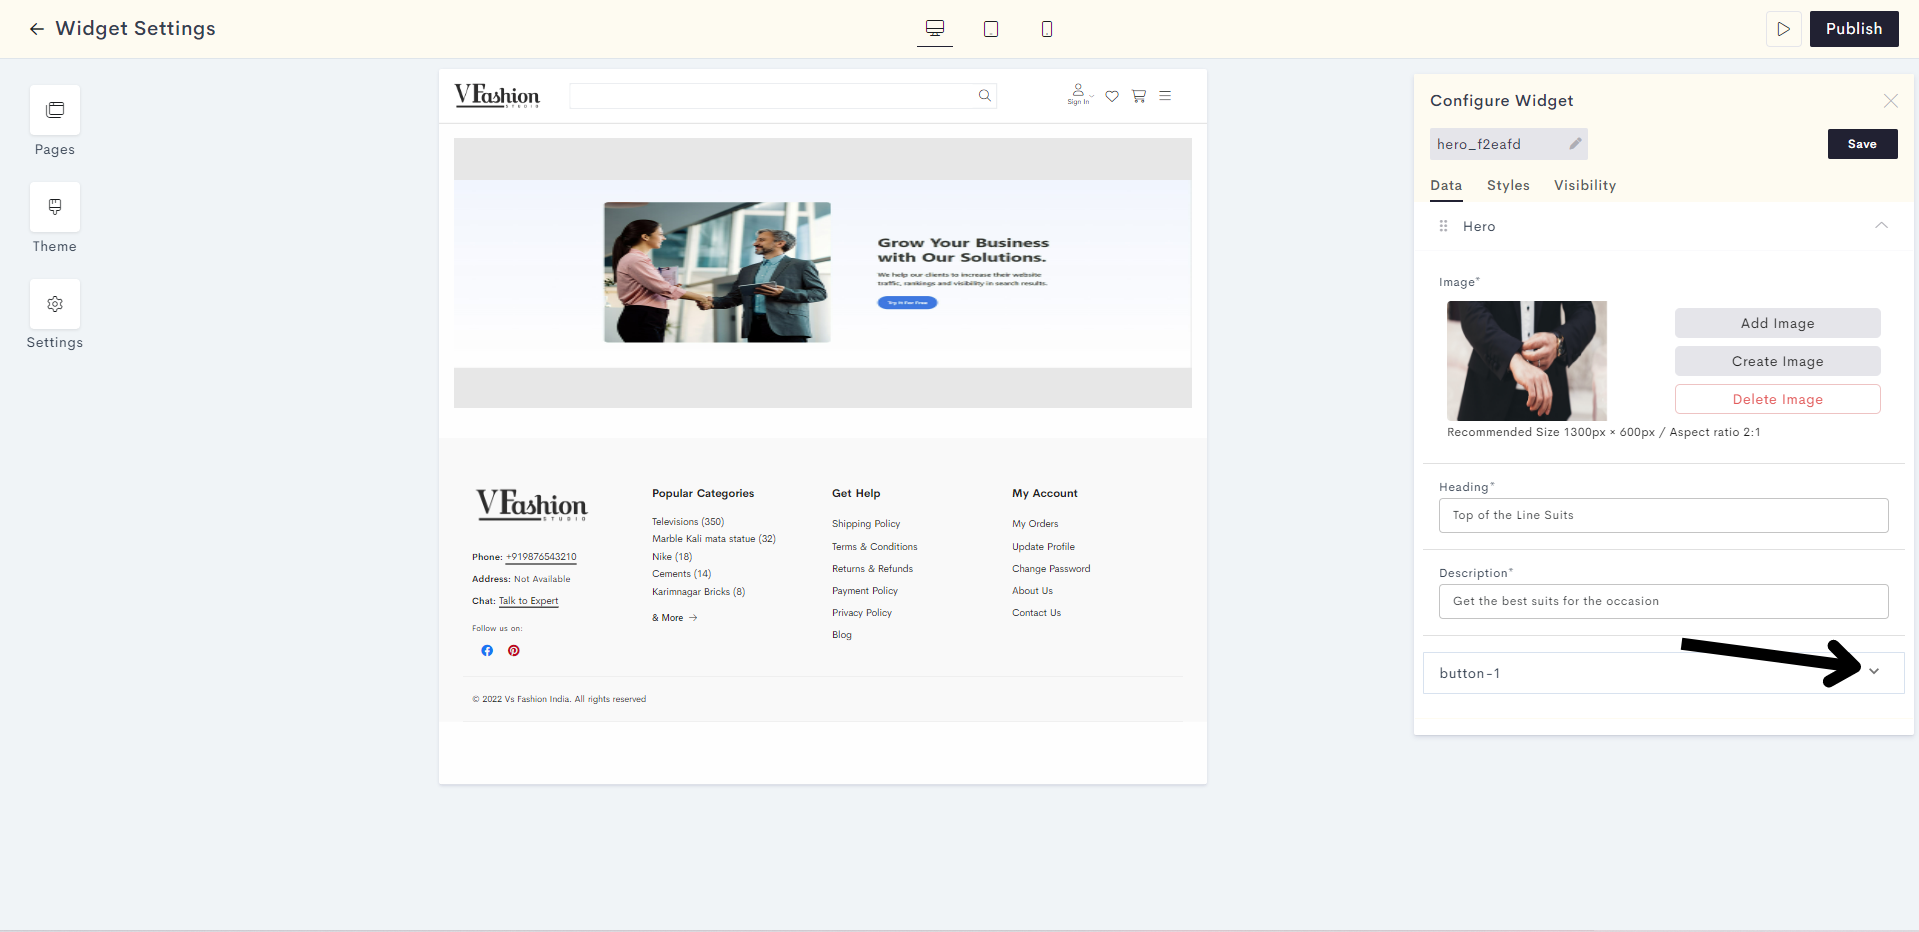
Enter your Hero section heading and description in the respective fields provided.
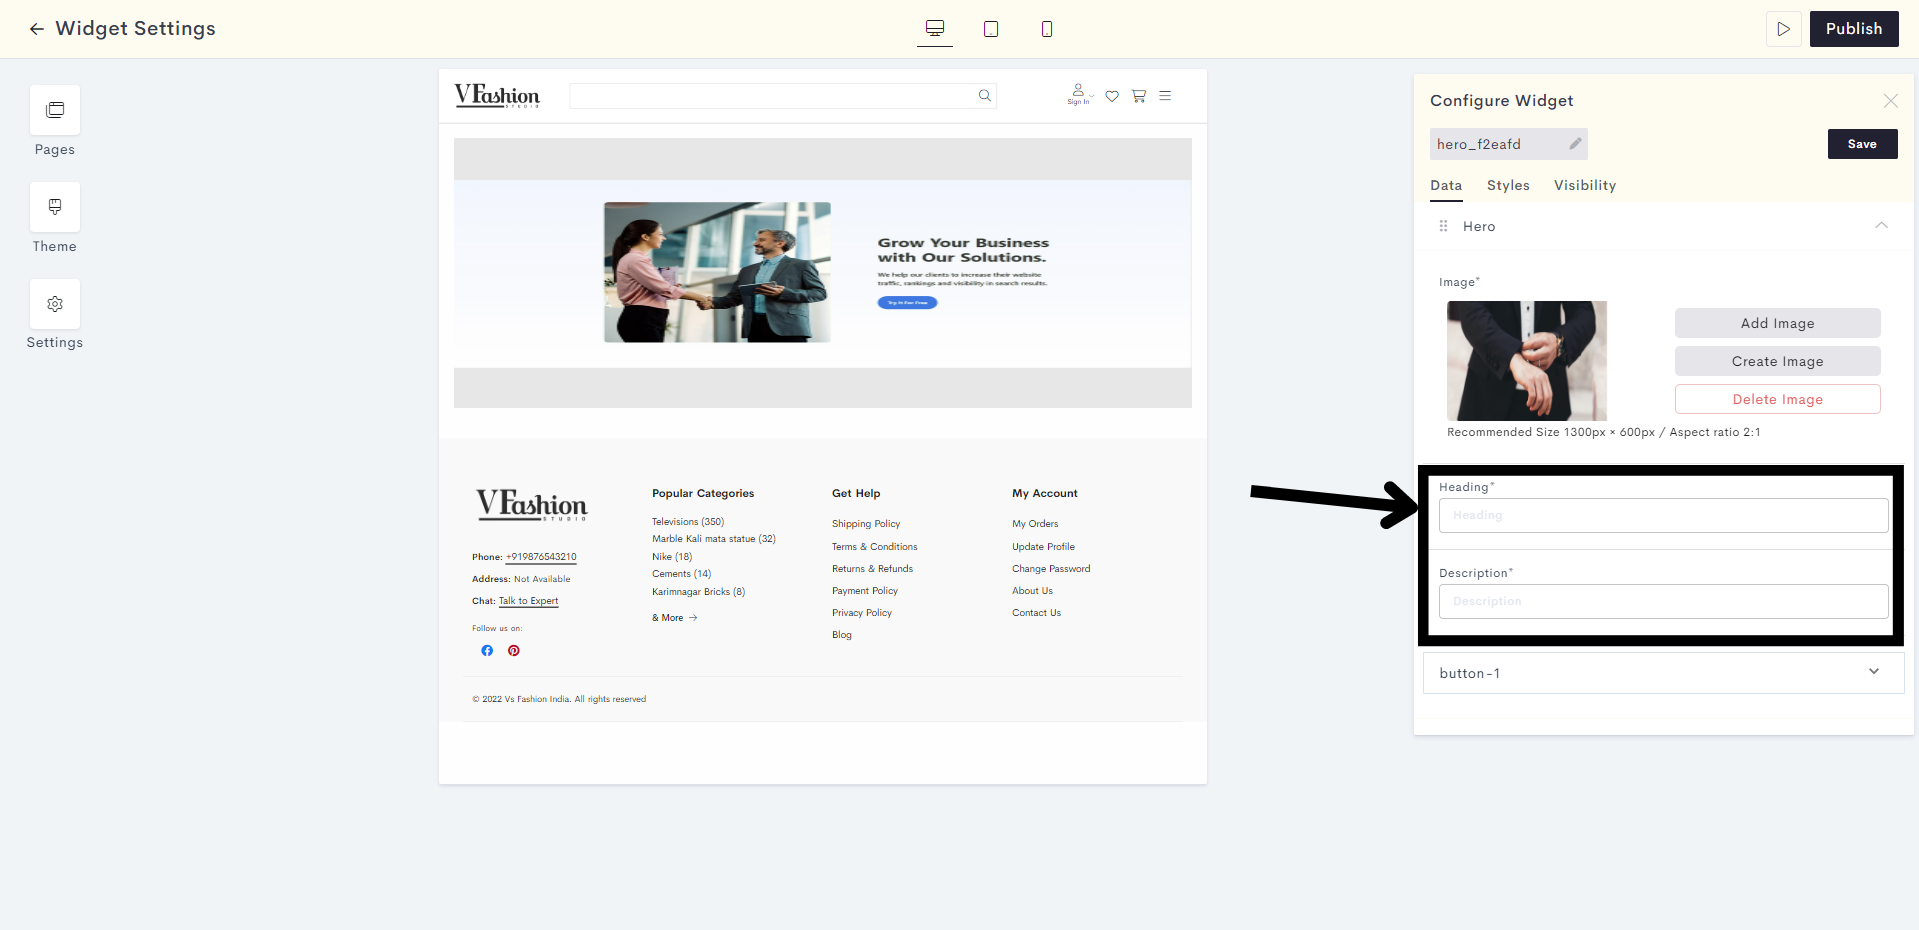
STEP 9:
Expand the drop down to configure your button.
STEP 10:
Choose your button type between Solid and Outlined. Here we will choose Solid.
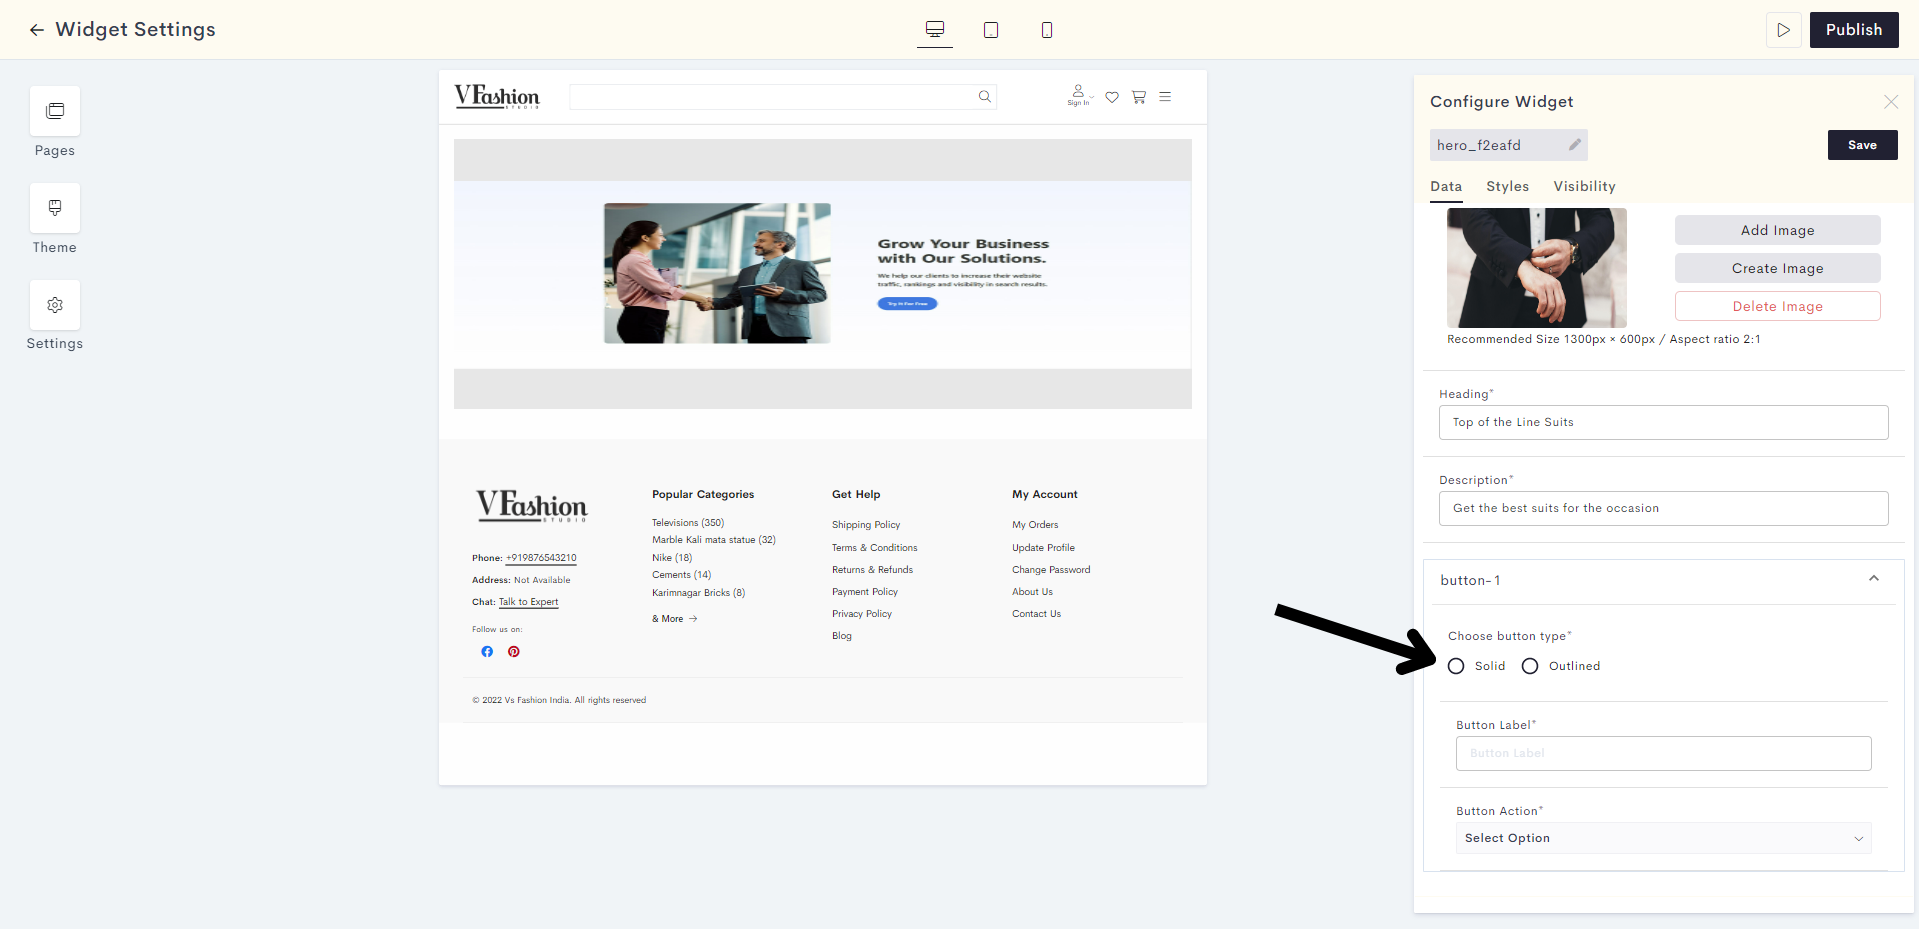
STEP 11:
Enter the button label in the field shown.
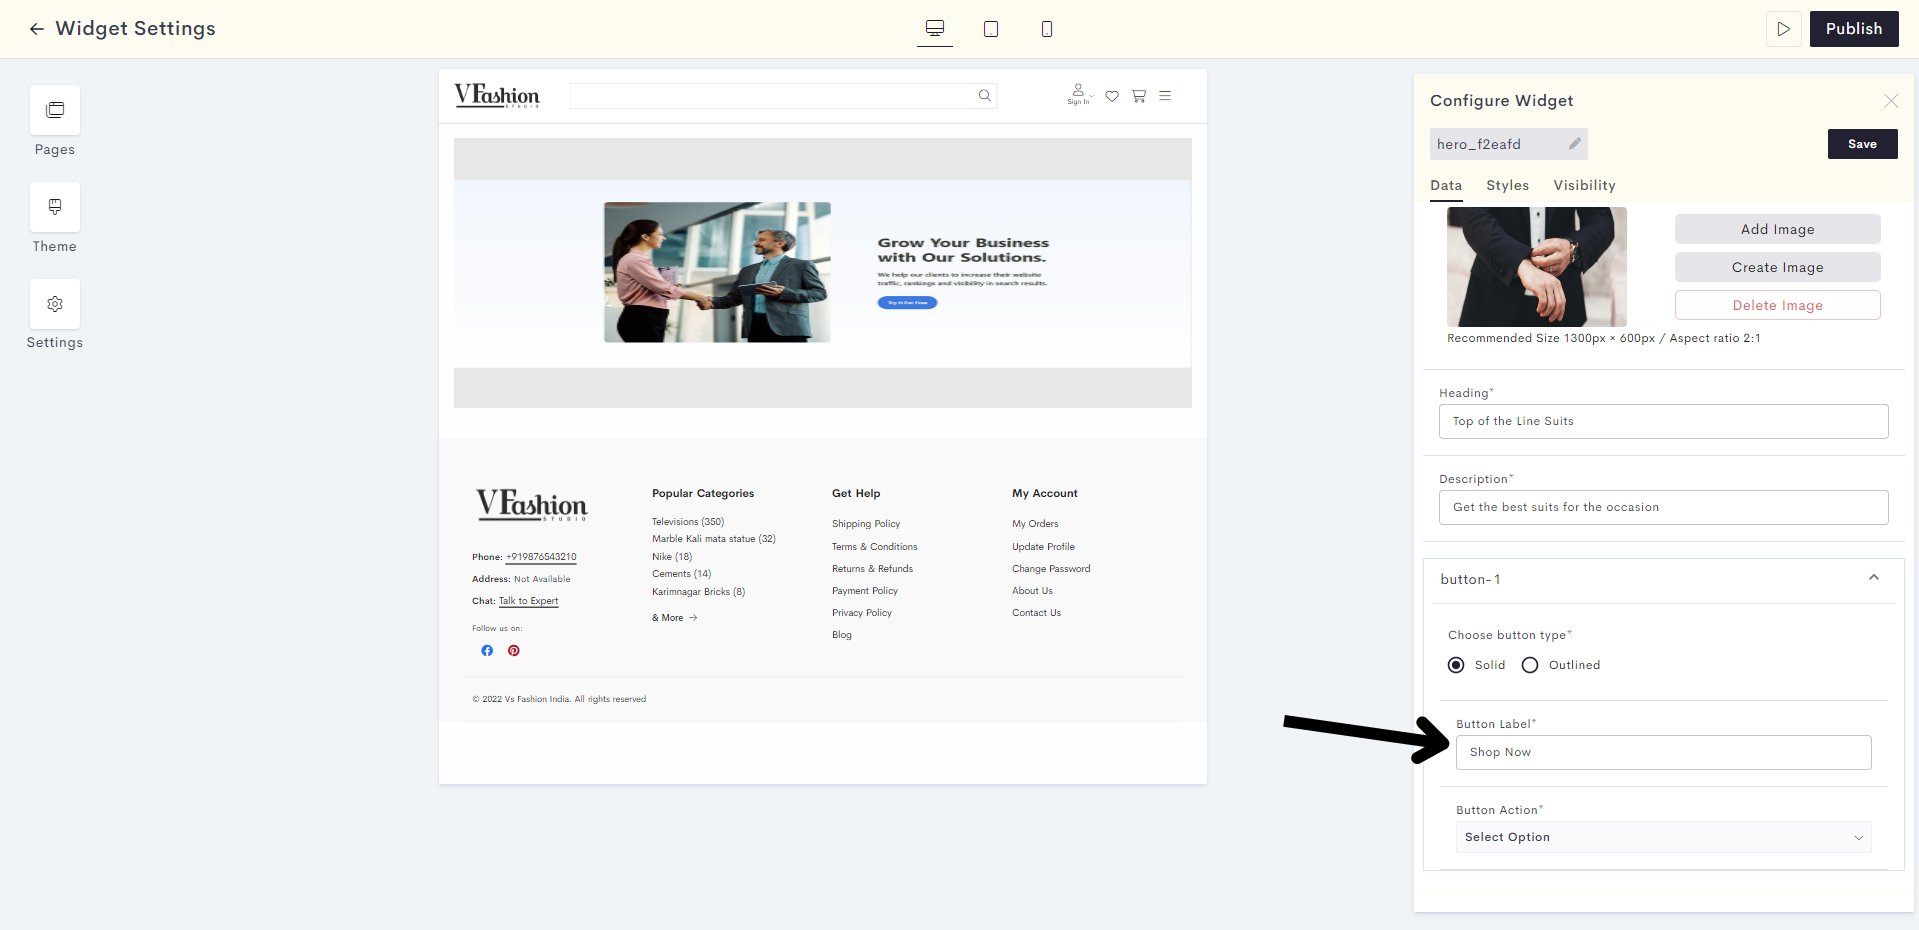
STEP 12:
Click on Select Option to choose the button action.
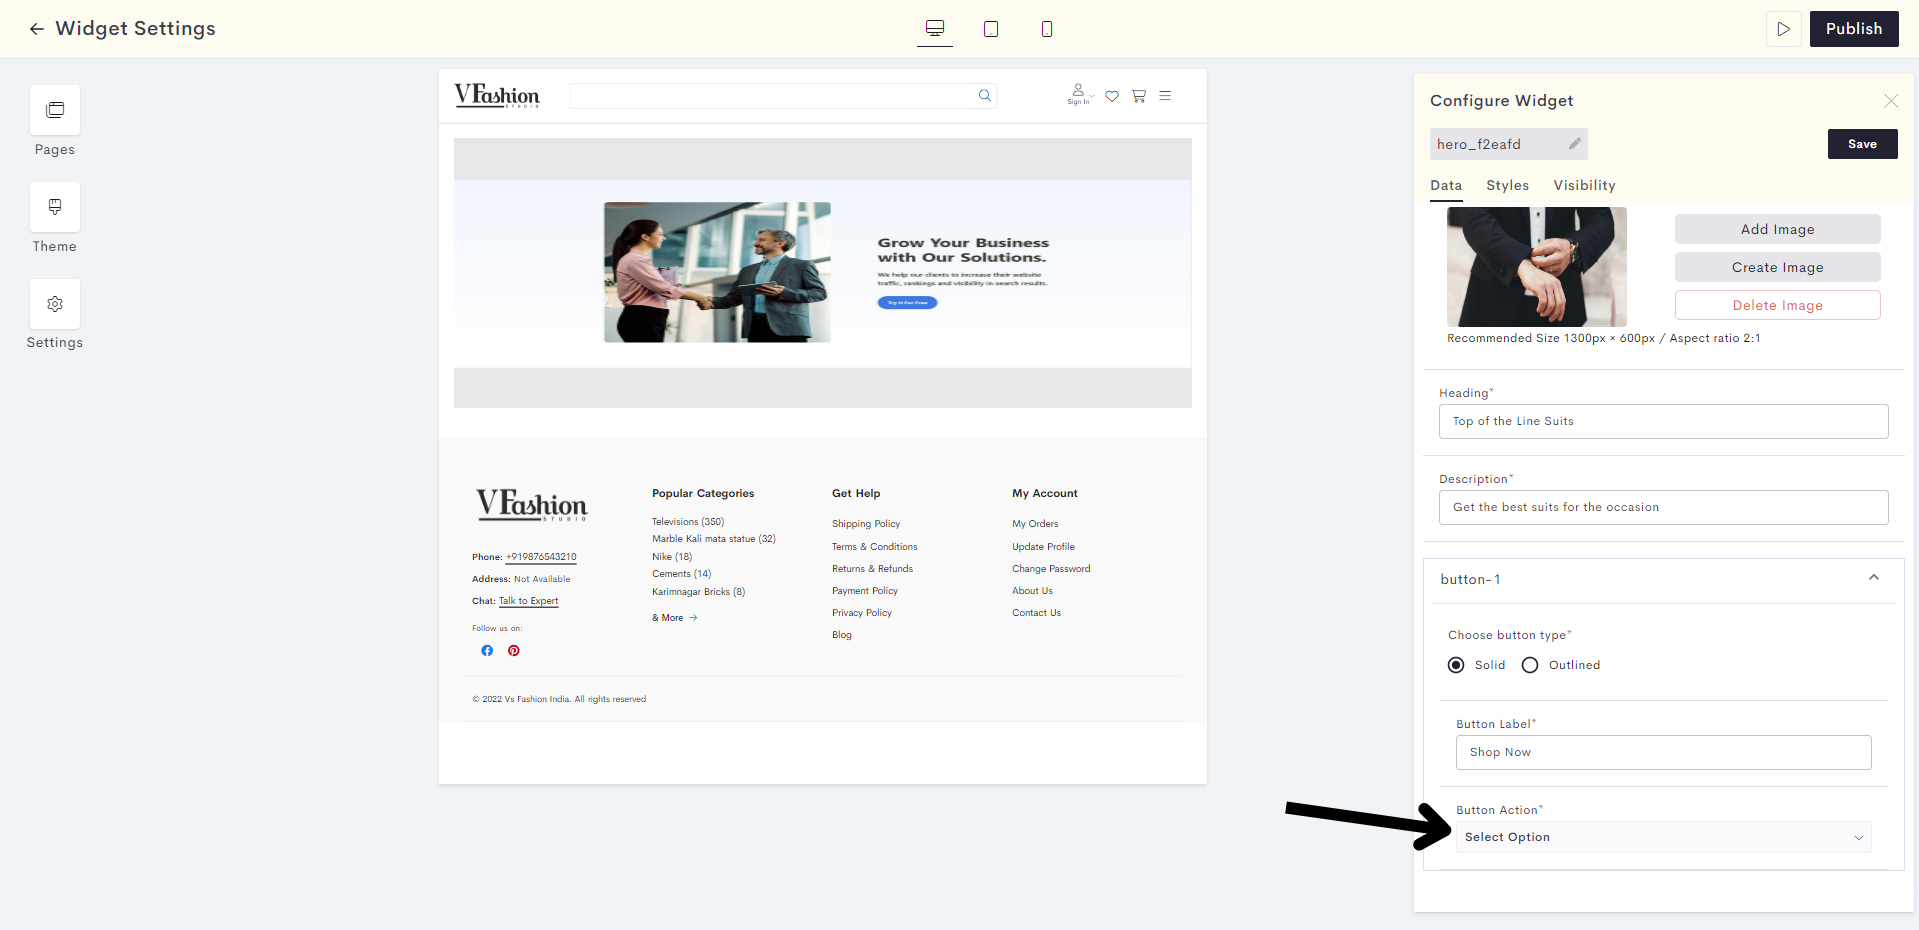
STEP 13:
You can choose your button action as a product, category, page, or any miscellaneous URL. Here we will click on Select Categories.
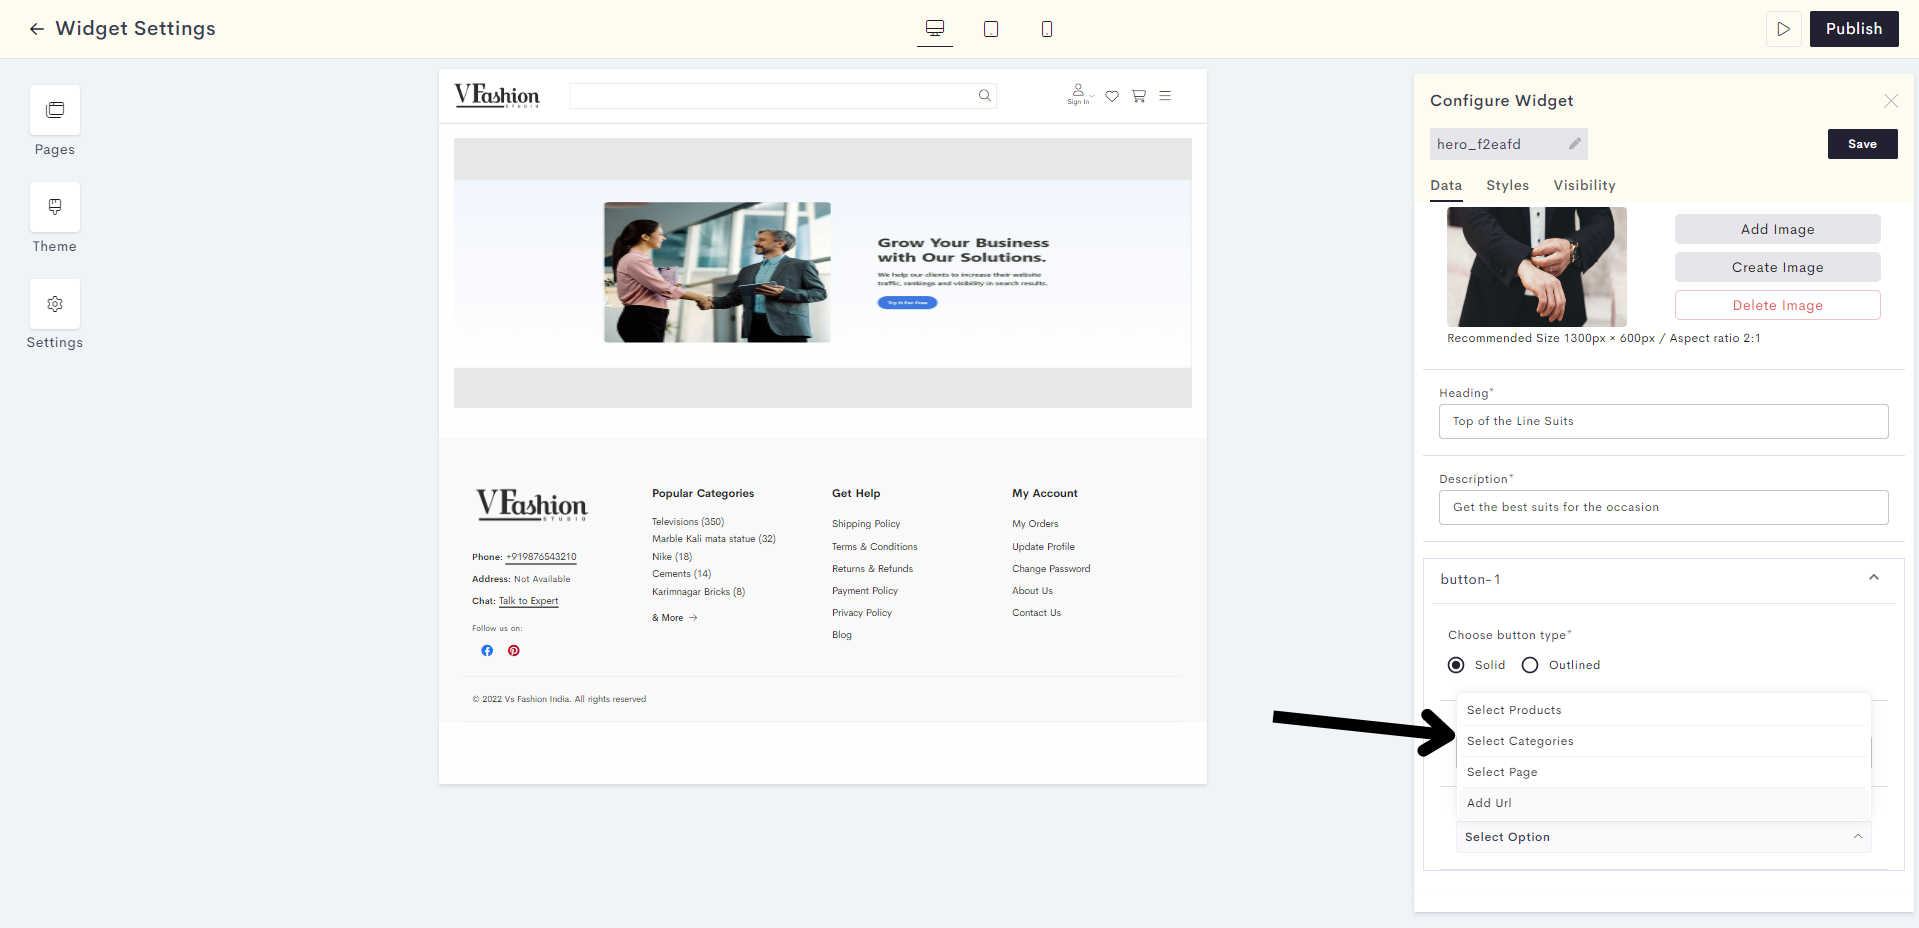
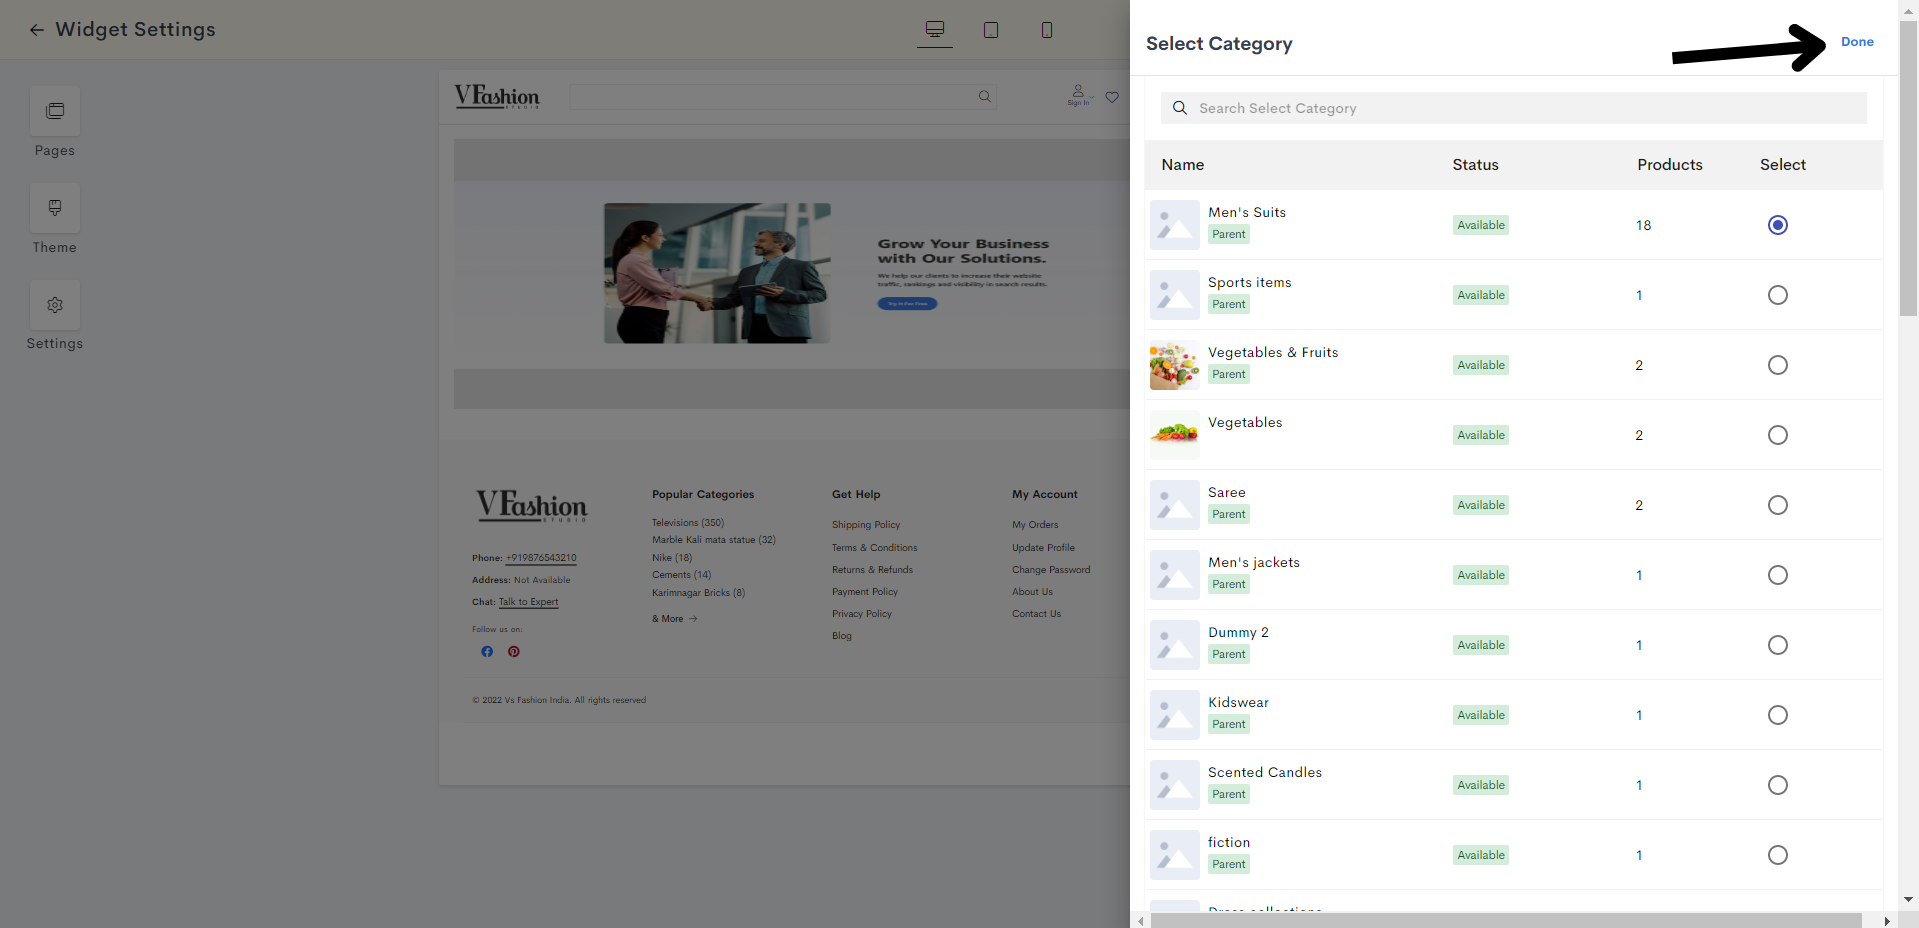
STEP 14:
Click on Add Category to link the category to your button.
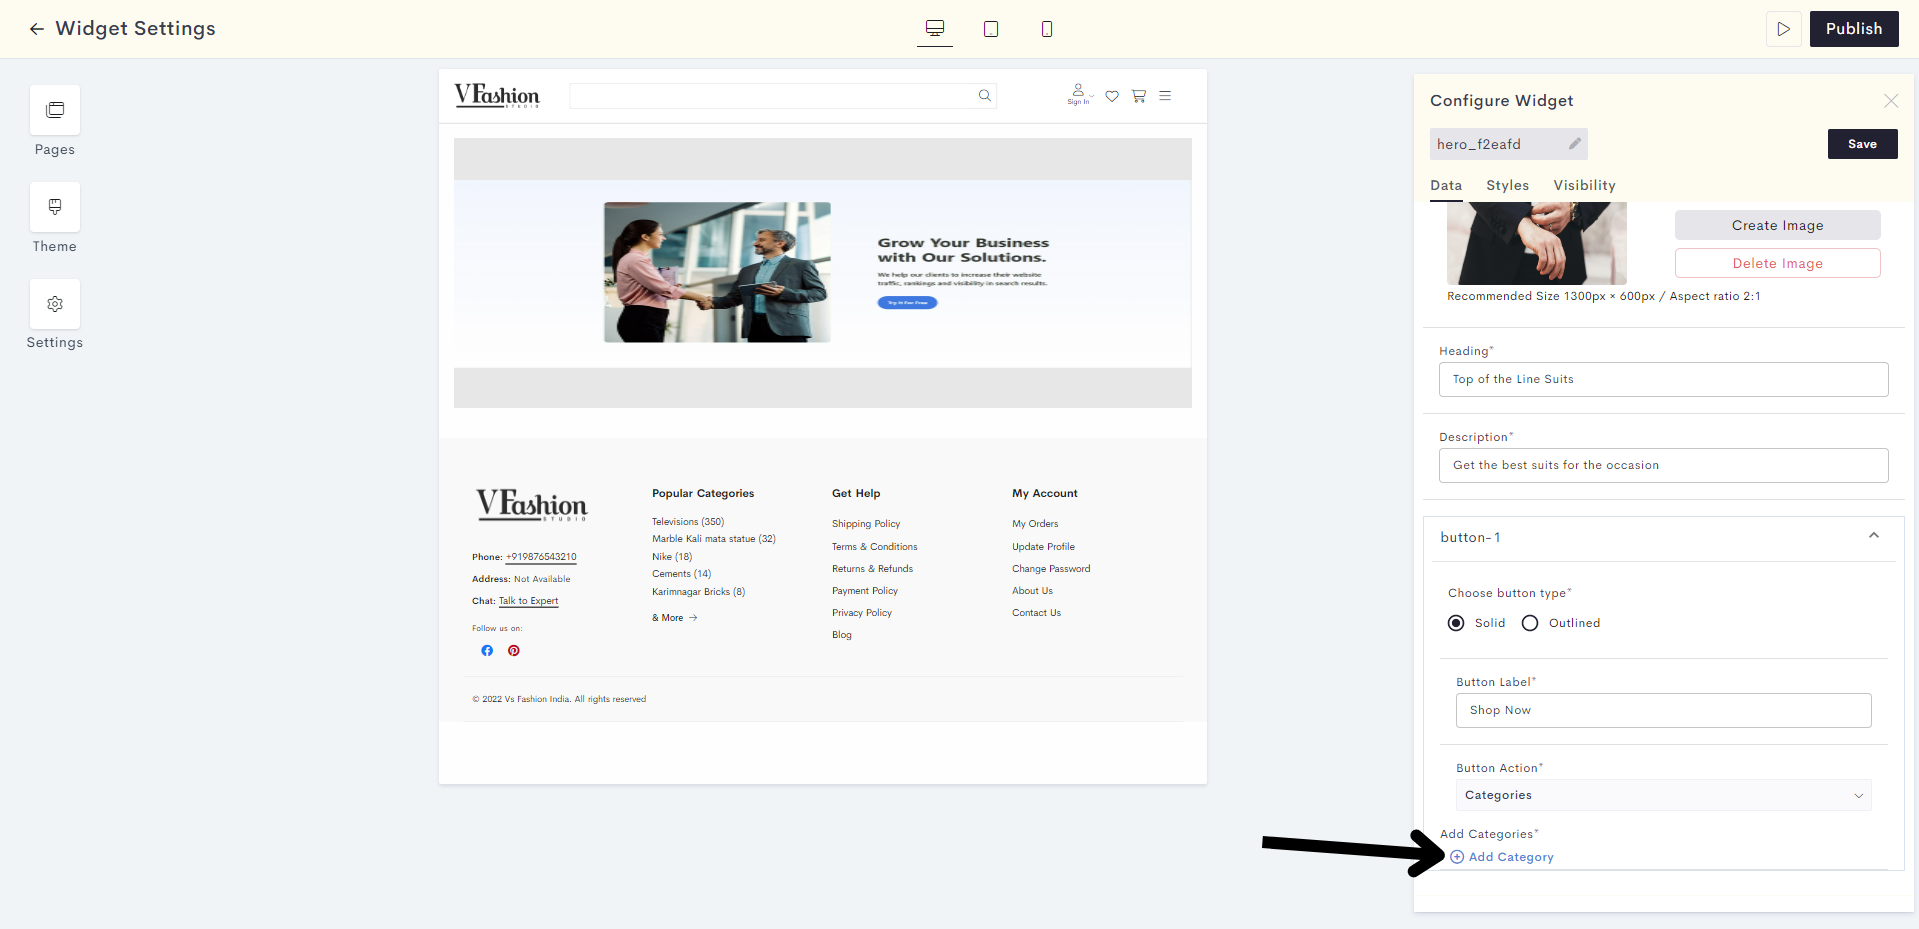
STEP 15:
Select your desired category and click on Done.
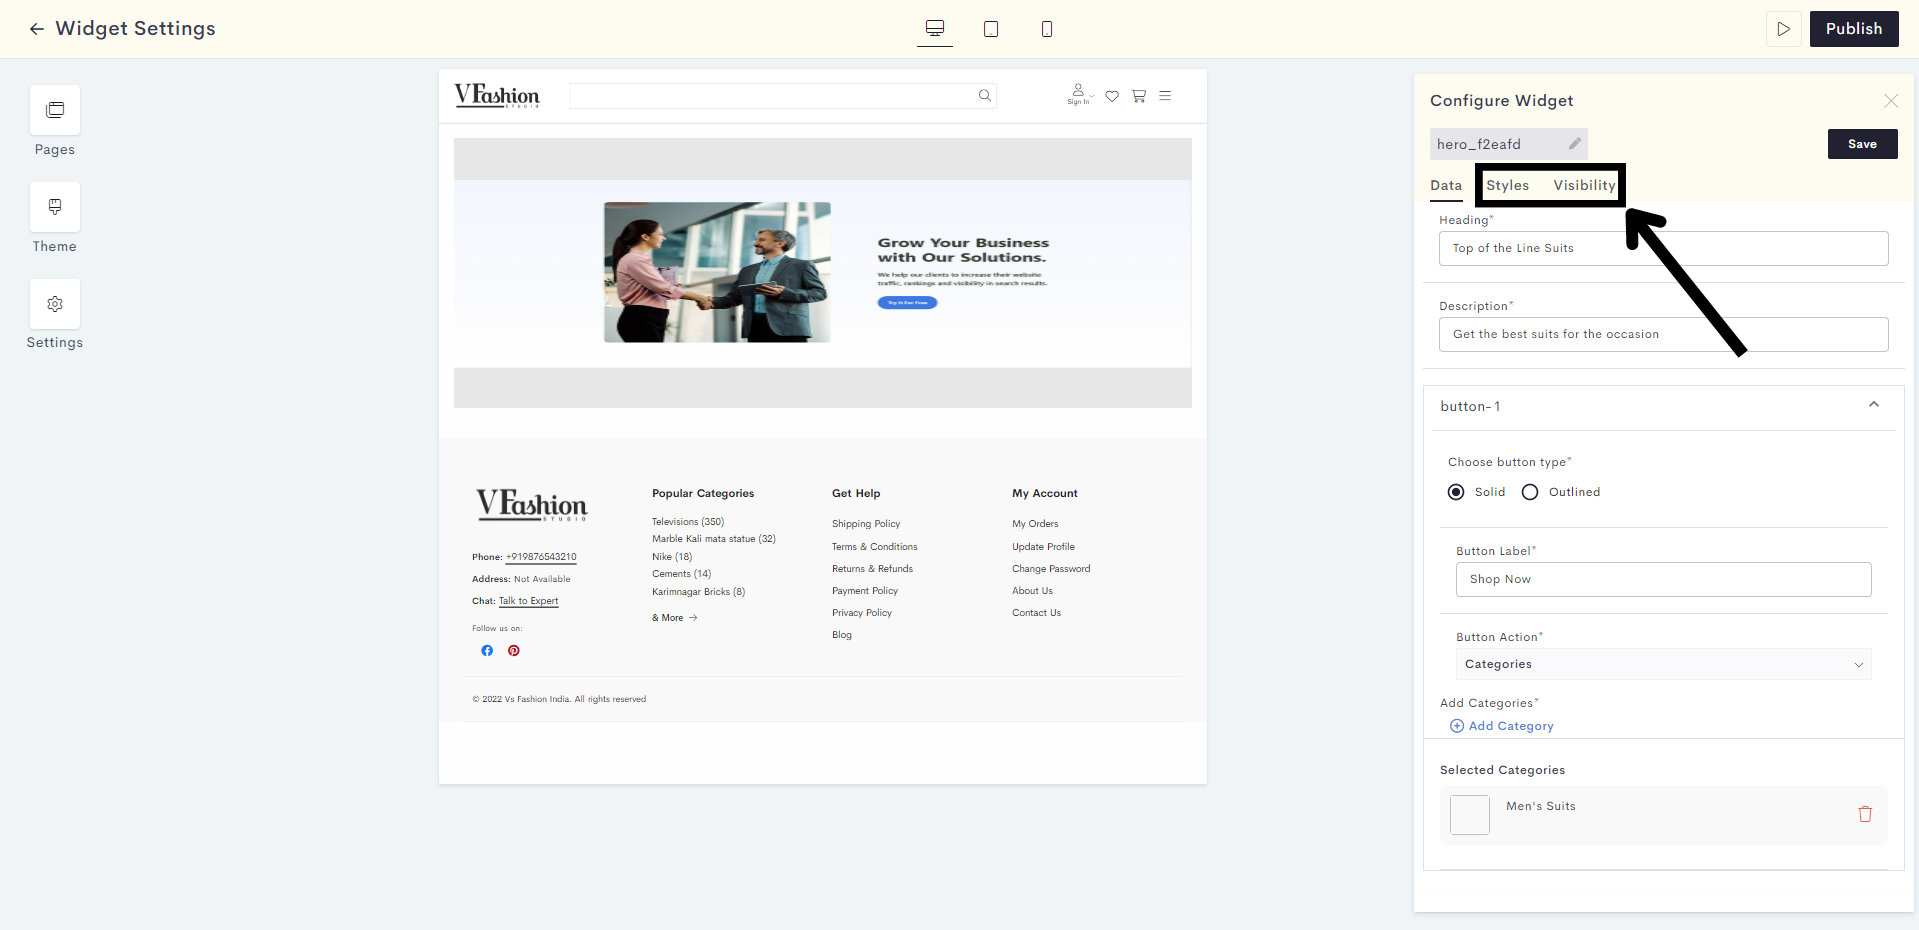
STEP 16:
You can alter the styling and visibility settings of your Hero section by clicking on Styles and Visibility respectively.
STEP 17:
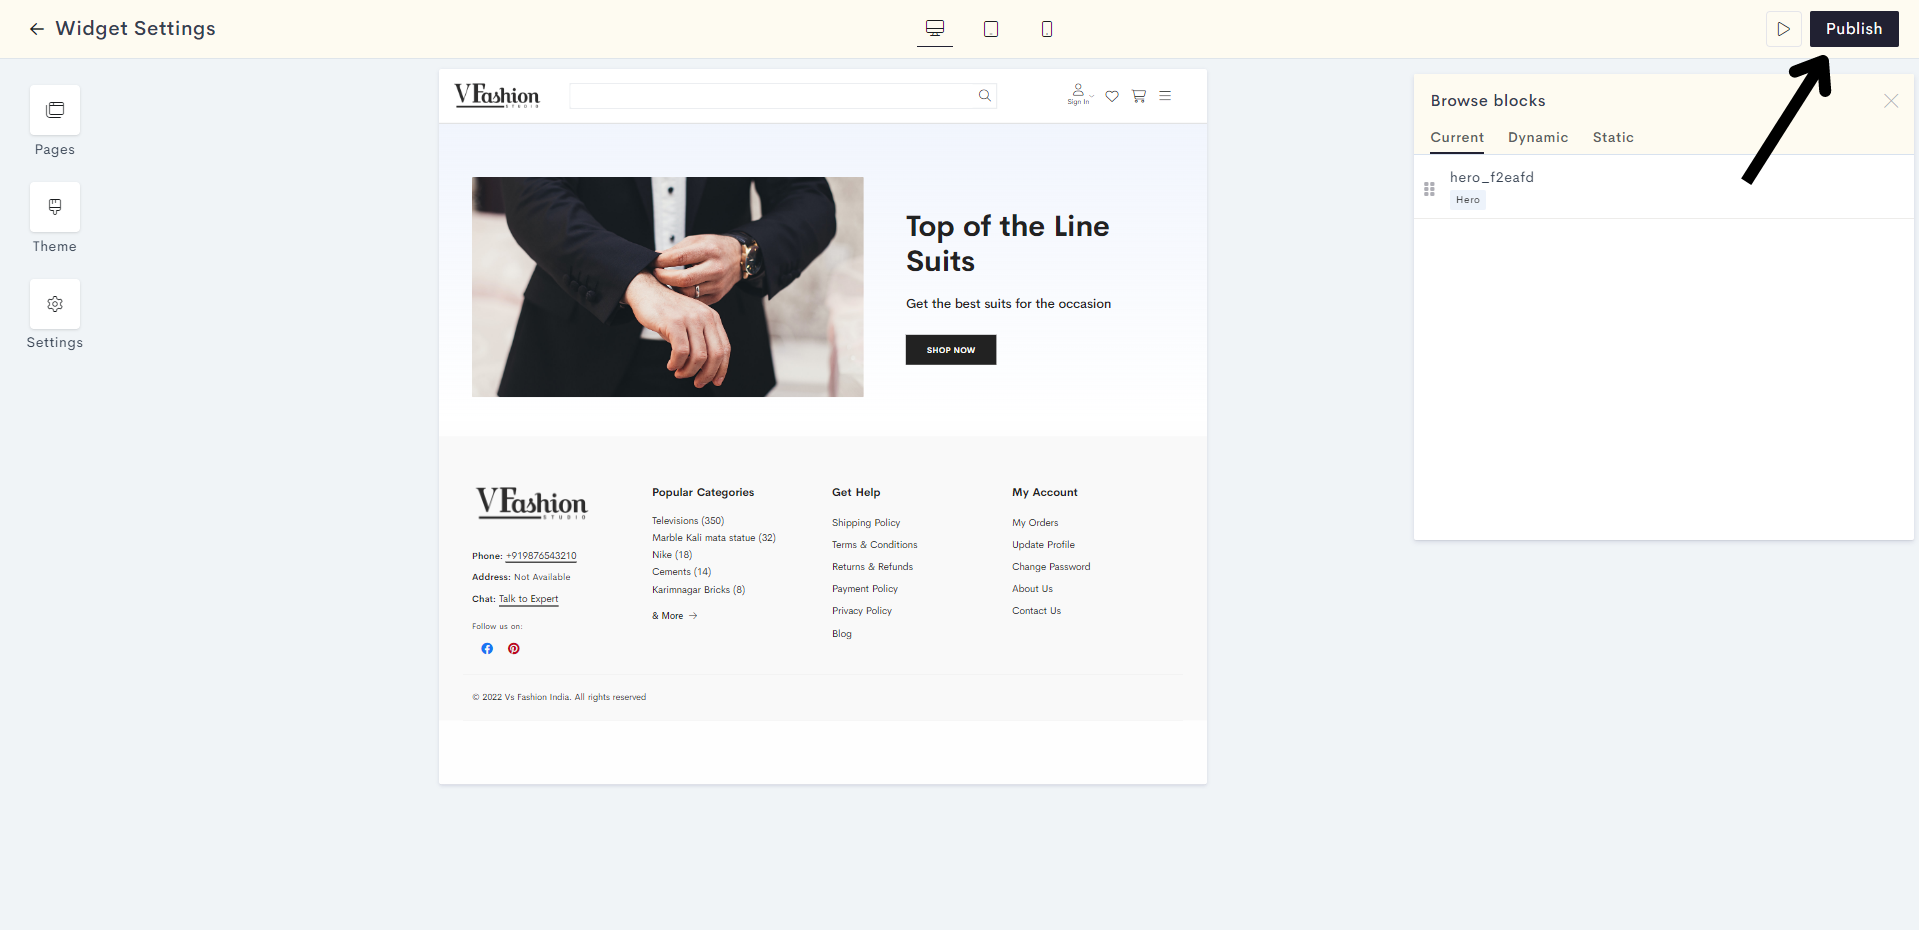
Once you are satisfied with your Hero section, click on Save.
466f.png?alt=media&token=f7094510-f47f-491b-bb25-c20f4dc58f77)
STEP 18:
You have successfully saved your Hero section. Click on Publish to make it go live on your website.
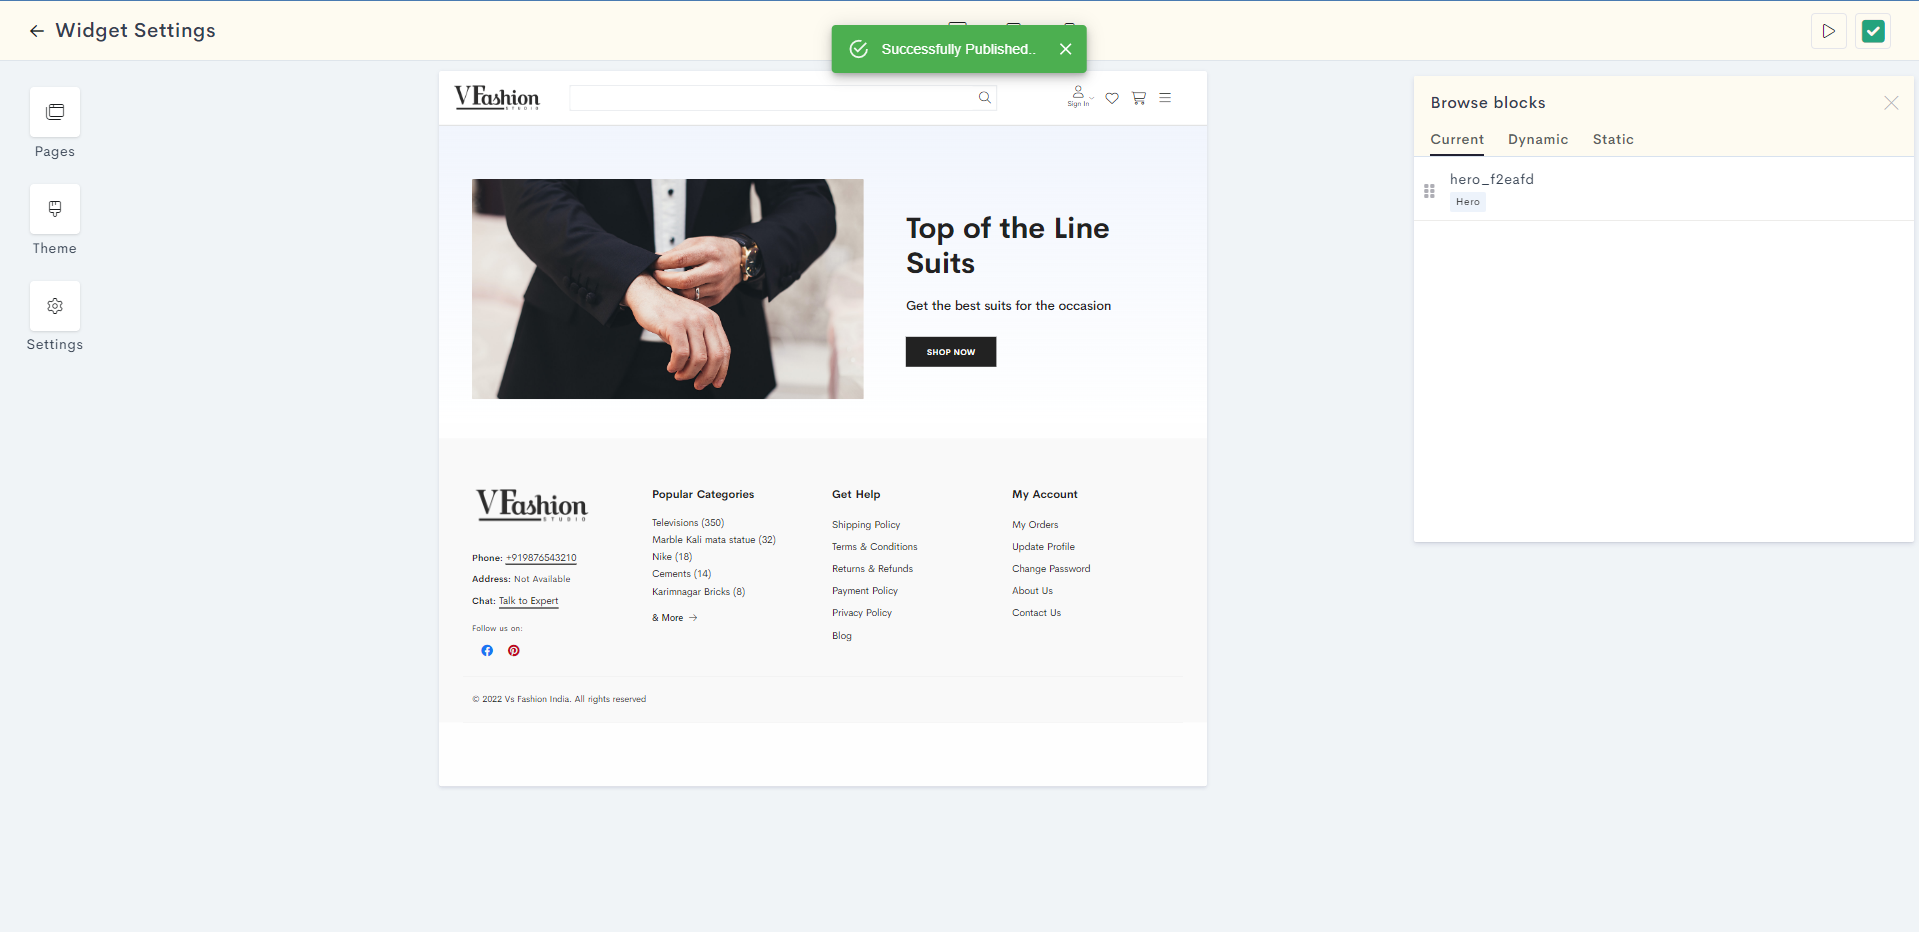
You have successfully published your clients widget to your website.
Last modified 7mo ago