%2520(1).png%3Falt%3Dmedia%26token%3D6fb48f09-a8eb-423f-8296-83ba614ae5a4)
%2520(1).png%3Falt%3Dmedia%26token%3D6fb48f09-a8eb-423f-8296-83ba614ae5a4)
Returns & Refunds Policy
You can watch the video version of this article here:
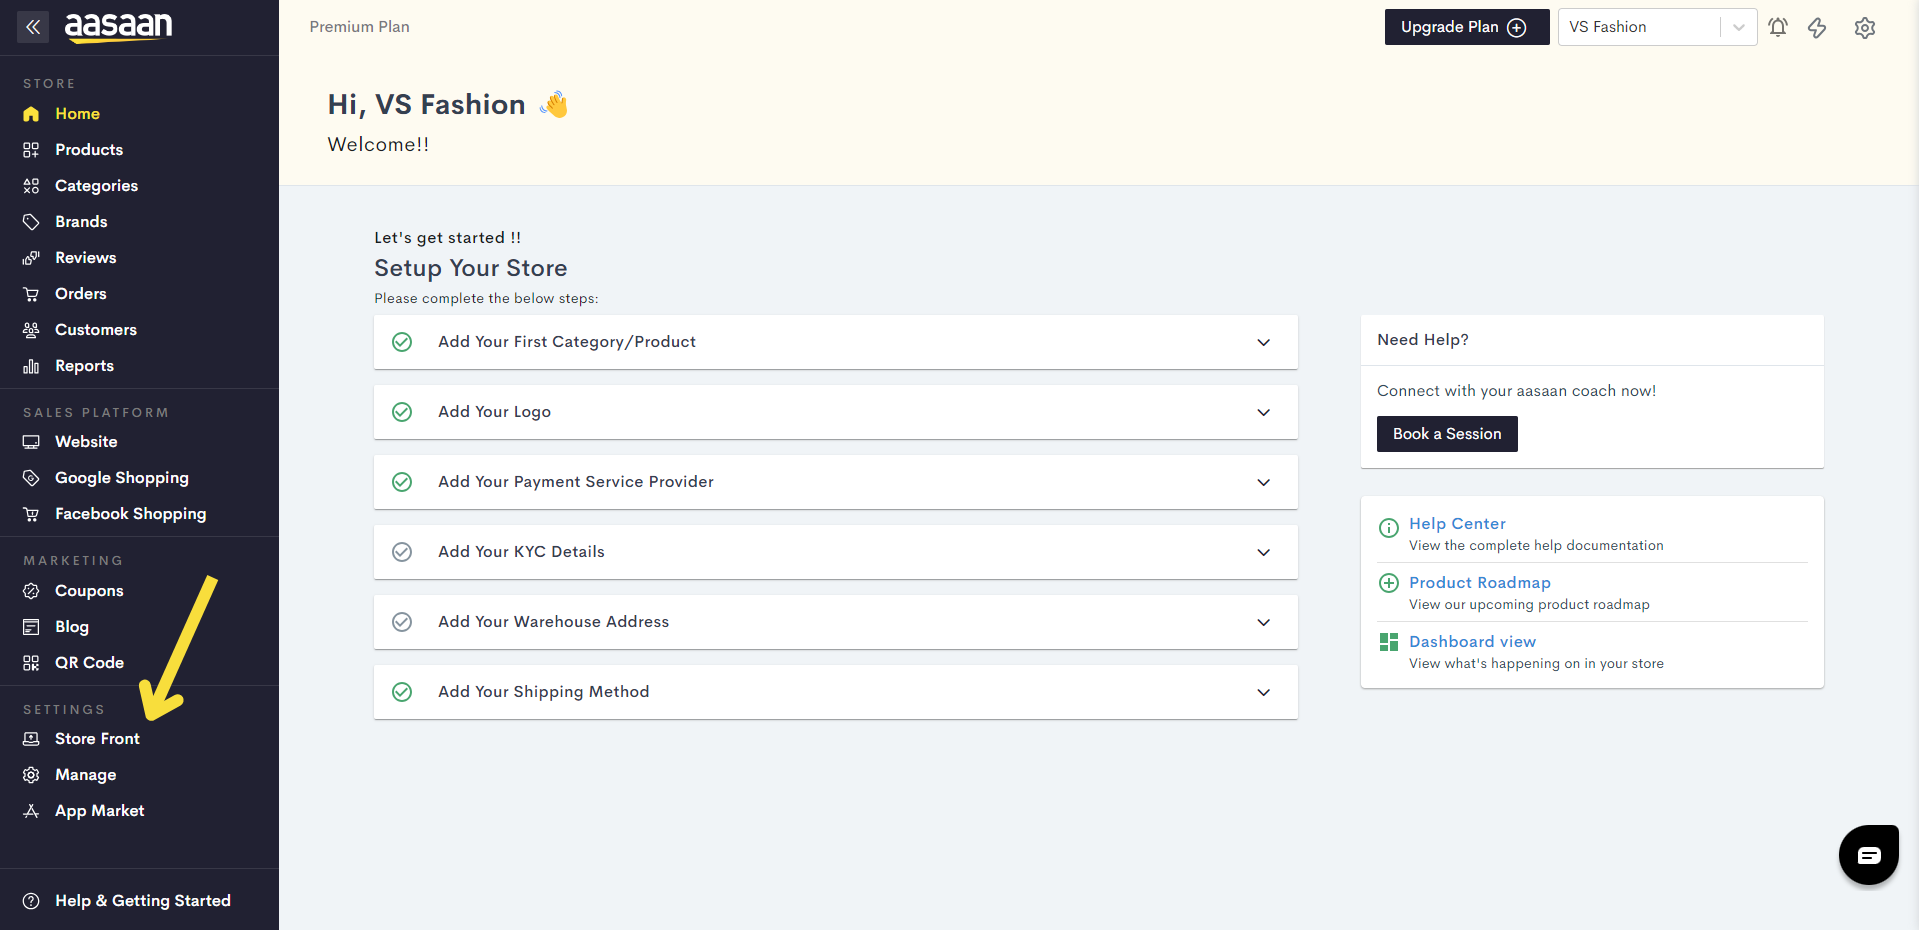
STEP 1:
Login to your aasaan desktop admin panel and click on Store Front.
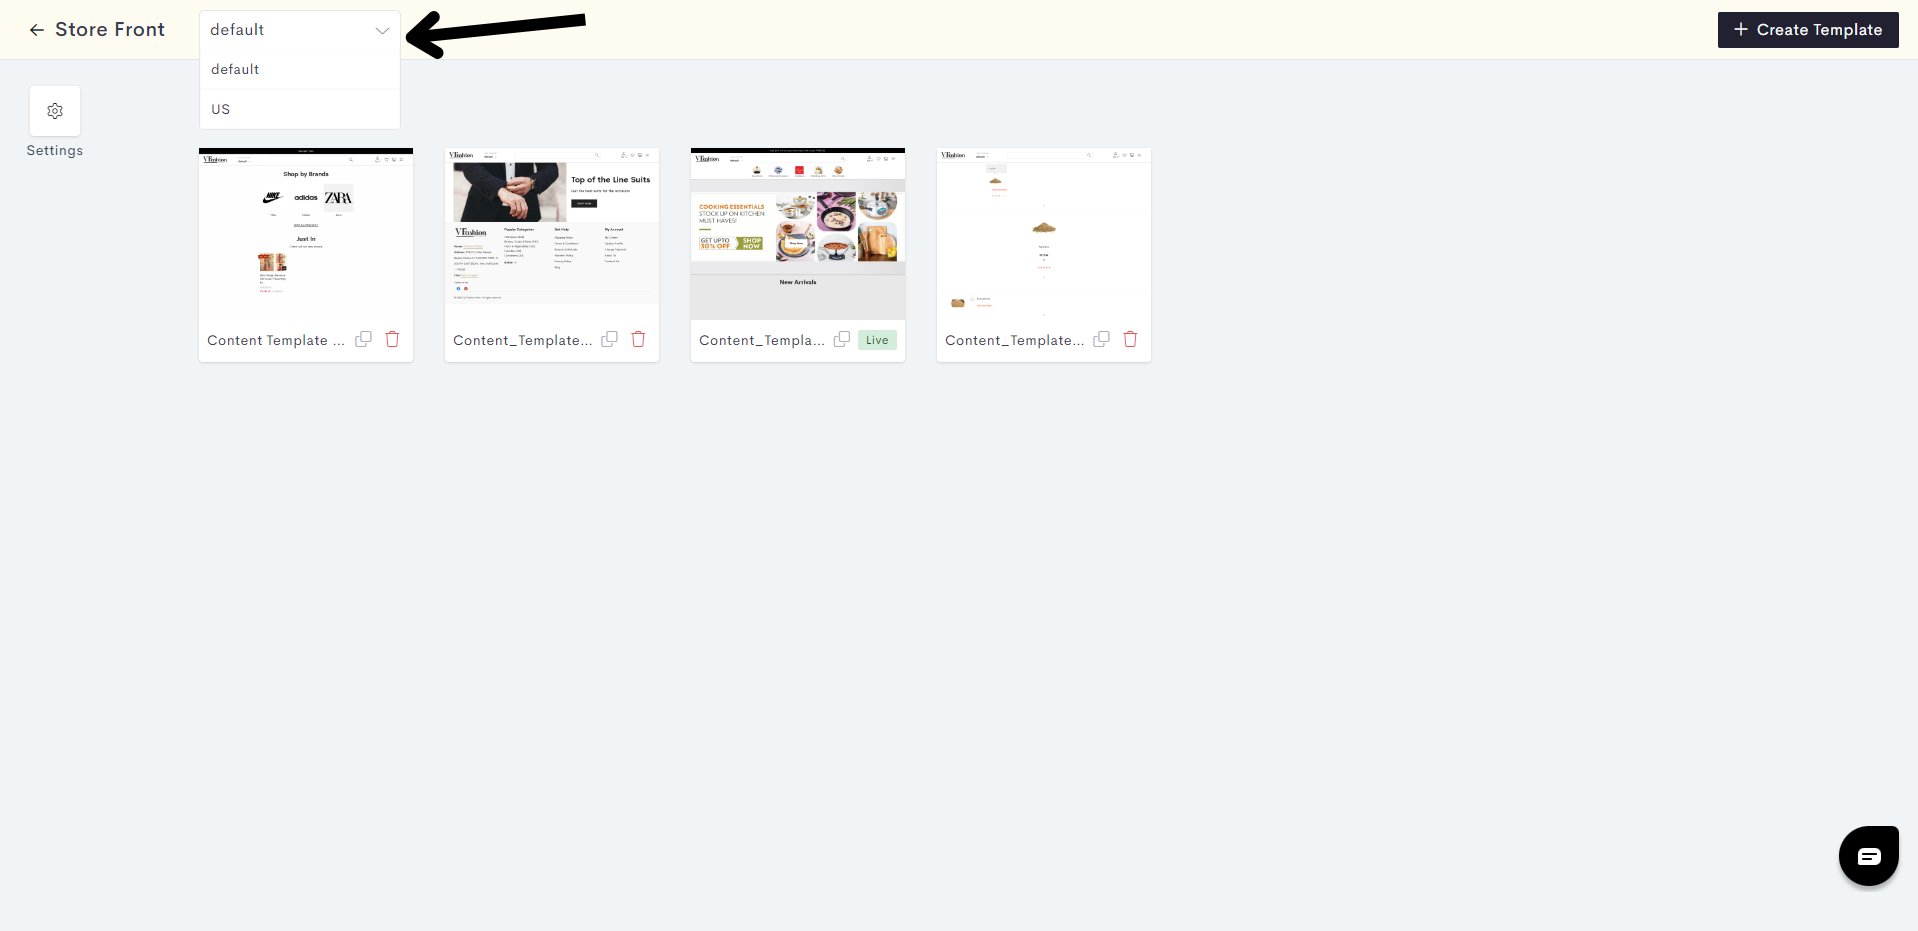
STEP 2:
Click on an existing content template in which you wish to add your page.

If you wish, you can also create a new content template by clicking on +Create Template.
Note: If you are subscribed to the business plan, you can choose which channel you wish to add your content template and custom page in as shown below. Click here to learn more about channels.
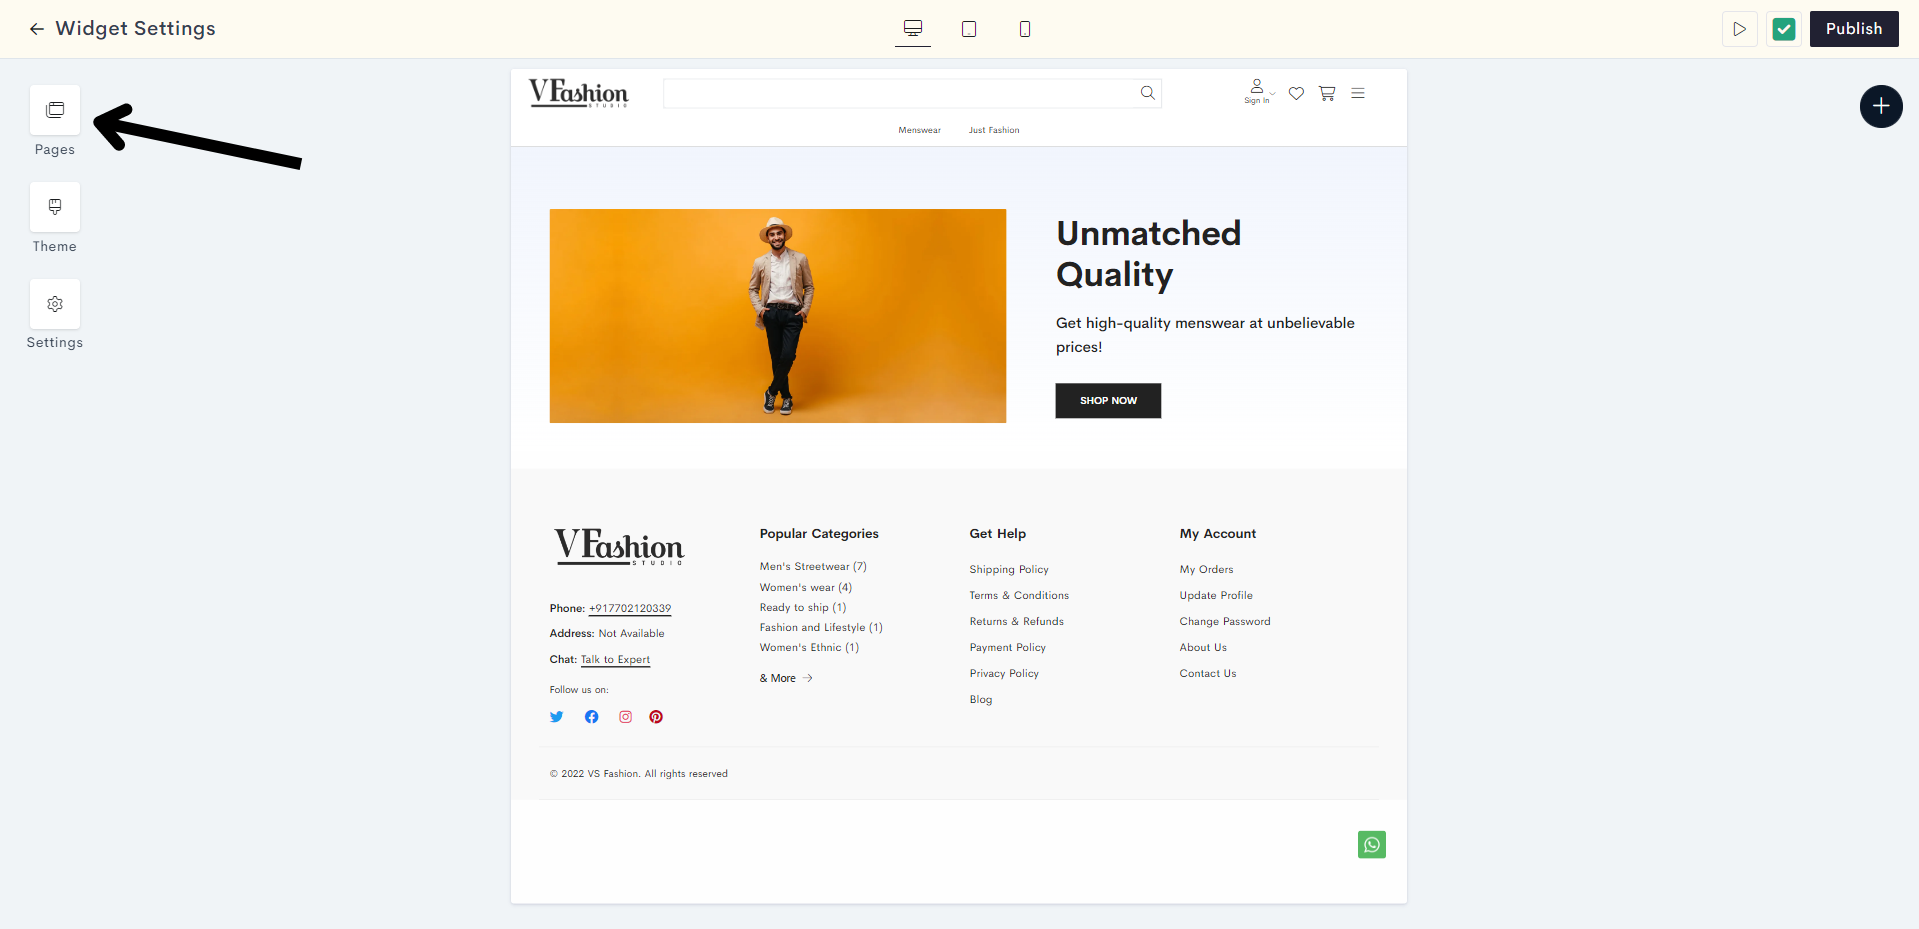
STEP 3:
Click on Pages.
STEP 4:
Click on Return & Refund Policies. This will take you to the Return & Refund Policies page.
STEP 5:
Click on the "Plus" Sign to add a new block to your Return & Refund Policies page.
STEP 6:
Click on Static.
STEP 7:
Expand the Policy section and click on Policy 1.
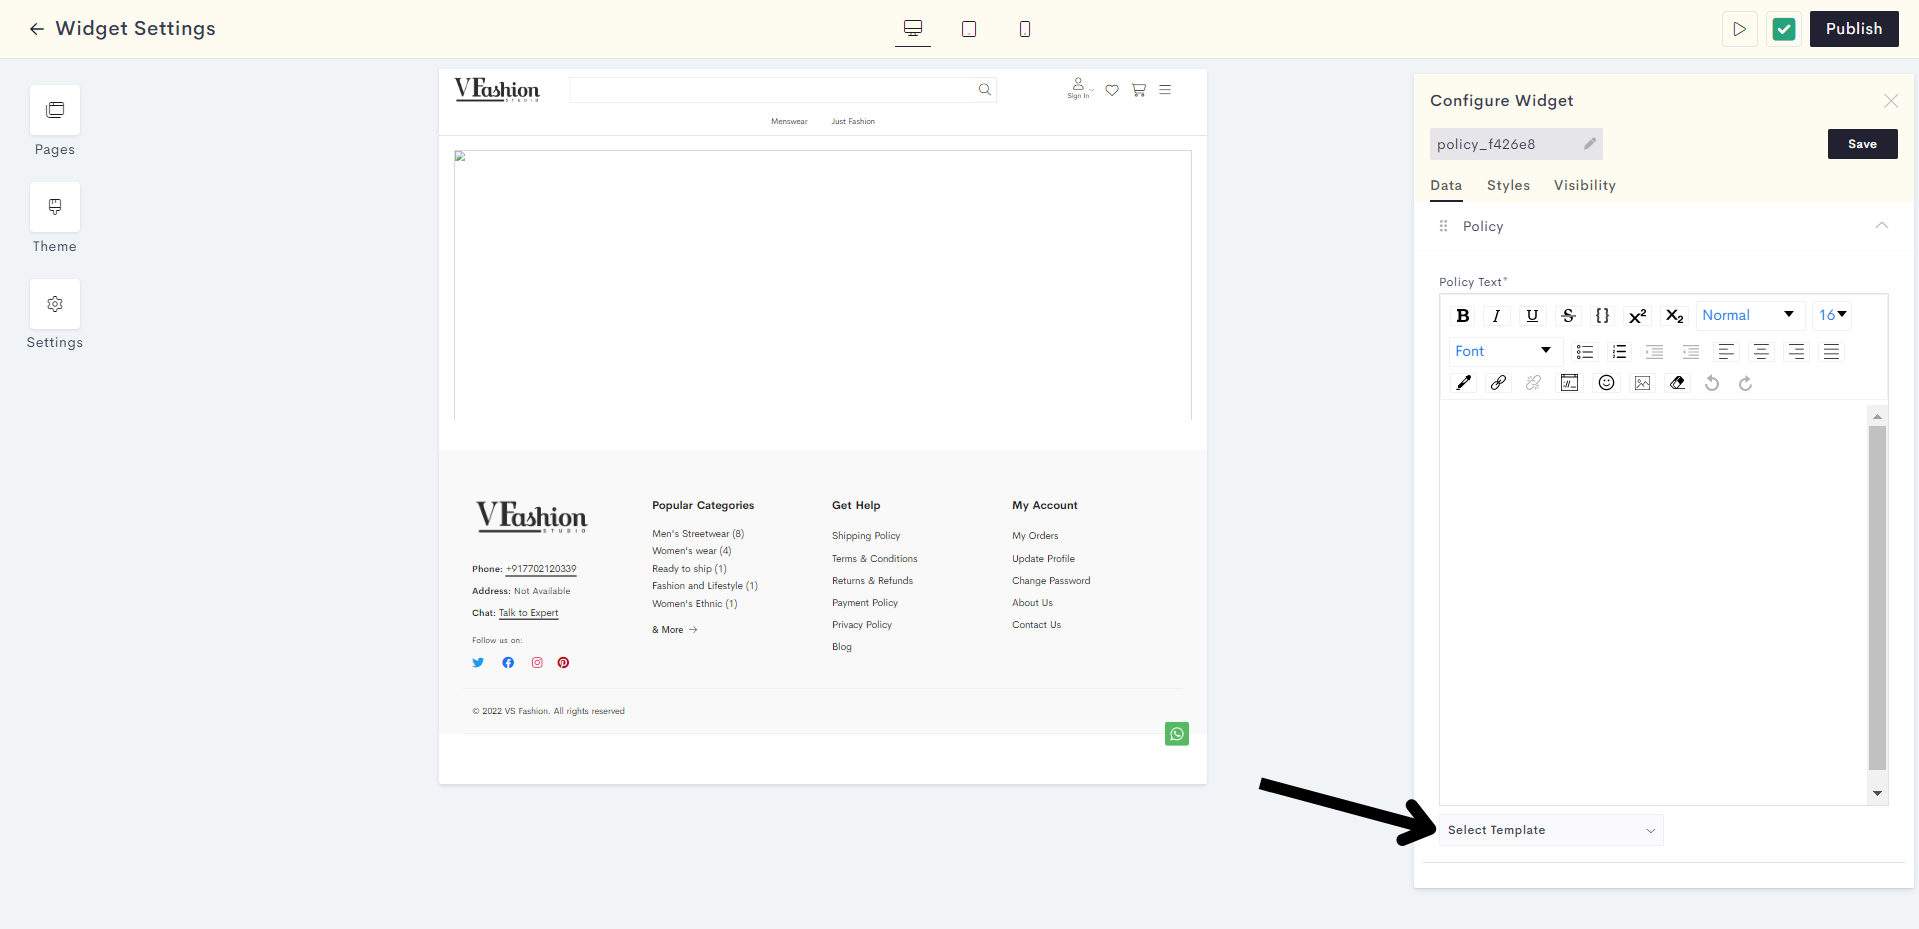
STEP 8:
Here you can either add your own return and refund policy, or use our template. If you wish to use our template, click on Select Template.
STEP 9:
Click on Return & Refund Policy Details.
This is how the template looks. You can use this as your return and refund policy, or you can modify it to suit your requirements.
STEP 10:
You can customize the styling and visibility settings of your return & refund policy by clicking on Styles and Visibility respectively.
STEP 11:
Once you are satisfied with your return & refund policy, click on Save.
STEP 12:
Your return & refund policy has been successfully saved. Click on Publish to make your policy live on your website.
Your return & refund policy has been successfully published to your website.
Last modified 3mo ago